☎ Call ☏ WhatsApp

Interior design

Offbeat Dining Room Furniture Styles For The Modern Apartment: Eclectic Tips

Offbeat Dining Room Furniture Styles for the Modern Apartment
Interior A to Z · Residential Interiors · Delhi NCR · Gurgaon · Noida Call +91 98910 50117
Dining · Furniture · Modern Apartments

Offbeat Dining Room Furniture Styles for the Modern Apartment

Move beyond the predictable dining set. Explore curved tables, sculptural chairs, benches, mixed seating, unusual materials and compact furniture ideas that give a modern apartment a more personal dining space.

Distinctive modern dining room furniture in an apartment interior
The most interesting dining rooms usually combine one unexpected furniture idea with disciplined proportion and a calm background.
Beyond the matching set

Offbeat does not have to mean impractical

Modern apartment interiors often benefit from furniture that is slightly unexpected. A curved table can soften a compact room, a bench can change the seating rhythm, and a sculptural chair can become a visual focal point without requiring a complete redesign.

The principle is simple: start with room dimensions and circulation, then introduce personality through shape, material, colour and proportion.

12 furniture directions

Offbeat dining room furniture styles worth considering

01 — CURVES

Curved dining tables

Rounded edges soften the geometry of an apartment and can make circulation around the table feel more fluid.

02 — SCULPTURE

Sculptural dining chairs

Choose chairs with distinctive backs, curved arms or unusual silhouettes and keep the table comparatively simple.

03 — MIX

Mixed dining chairs

Different chairs can look intentional when they share a colour, material, height or design language.

04 — BENCH

One-sided bench seating

A bench can make a compact dining arrangement feel less formal and can tuck beneath the table when not in use.

05 — PEDESTAL

Pedestal-base tables

A central base removes multiple table legs from the seating zone and can create a cleaner visual profile.

06 — MATERIAL

Material contrast

Pair timber with stone, glass with metal, or upholstered seating with a solid sculptural table for visual tension.

07 — OVAL

Oval dining tables

Oval forms provide generous linear seating while keeping corners softer than a conventional rectangular table.

08 — COMPACT

Drop-leaf and extendable furniture

Flexible pieces can change function between everyday meals and occasional guests without permanently consuming floor area.

09 — VINTAGE

One vintage-inspired piece

A vintage chair, sideboard or table can introduce character while the rest of the room remains contemporary.

10 — COLOUR

Unexpected colour

A muted green, terracotta, deep blue or warm accent can make otherwise restrained furniture feel more individual.

11 — STORAGE

Statement sideboards

Use a distinctive sideboard as both practical storage and a strong horizontal feature on the dining wall.

12 — CUSTOM

Bespoke apartment furniture

Custom dimensions can solve awkward walls, tight circulation and unusual room proportions better than standard furniture.

Modern dining table with distinctive furniture styling

Let one piece break the pattern

A distinctive table can carry the personality of the dining room while the surrounding pieces remain quiet.

Contemporary dining chairs with sculptural shapes

Sculptural seating

Make the chairs part of the architecture.

Modern dining room with statement lighting

Finish with light

Use lighting to frame the unusual furniture.

Curved dining table in a contemporary apartment interior
01 · Shape

Use curves to soften an apartment layout

Rectangular furniture is efficient, but an apartment can sometimes feel dominated by straight walls and hard corners. A round or oval dining table introduces a softer visual rhythm.

Round tables Useful for compact layouts and conversation-focused seating.
Oval tables Combine the length of a rectangular table with softer ends.
Curved chairs Can echo the table shape and create a more cohesive composition.
Rounded storage A curved console or softened cabinet profile can repeat the idea without overdoing it.
02 · Mixed seating

Stop treating every dining chair as a clone

Mixing seating can give an apartment dining room a collected, less predictable character. The trick is to establish a visual relationship between the different pieces.

Same colour, different shapes Useful when you want variety without losing visual order.
Same material, different profiles Works well with wood, cane or upholstered chairs.
Chairs plus bench Creates a relaxed arrangement and can improve flexibility.
Statement end chairs Keep side chairs simple and give the two end positions more personality.
Mixed dining seating in a modern interior
03 · Apartment scale

Choose unusual furniture without making the room feel crowded

Furniture ideaWorks especially well whenWatch out for
Round tableThe room is compact or circulation around corners is tight.Oversizing the diameter can quickly consume floor space.
Extendable tableEveryday seating is smaller than the occasional guest count.Check the fully extended footprint before buying.
BenchYou want flexible seating or a lighter furniture footprint.Leave enough wall clearance for comfortable use.
Pedestal tableYou want more legroom and a cleaner base.Check stability and base proportions.
Slim sideboardYou need dining storage but have limited wall depth.A deep cabinet can interfere with circulation.
Statement chairYou want one strong visual focal point.Too many different shapes can make a small room feel busy.
Modern dining room combining wood stone and upholstered furniture
04 · Material contrast

Make the furniture interesting through material, not clutter

Offbeat furniture does not need exaggerated shapes. Material contrast can be enough to create a distinctive dining room.

Wood + stone Warm timber against a stone surface creates a balanced modern contrast.
Glass + metal A lighter visual combination for apartments where you want the room to feel open.
Upholstery + timber Adds softness and comfort to a simple dining arrangement.
Cane + contemporary forms Introduces texture and craftsmanship without making the room traditionally styled.
05 · Storage

Turn the dining wall into a furniture statement

A dining room often has one large wall that can do more than hold artwork. A well-designed sideboard, crockery unit or display cabinet can combine storage and identity.

Low sideboard Best when you want a strong horizontal line and accessible serving storage.
Full-height unit Useful when storage requirements are high and the room can support vertical cabinetry.
Open niches Display a limited number of ceramics, books or decorative pieces.
Integrated lighting Use subtle shelf lighting to turn storage into an evening feature.
Statement dining sideboard and wall storage in a modern apartment
06 · Style combinations

Four offbeat combinations that still feel refined

A

Soft Minimal

Oval wood table + curved upholstered chairs + warm neutral walls + simple pendant.

B

Contemporary Eclectic

Pedestal table + mixed chairs + statement artwork + sculptural sideboard.

C

Modern Natural

Timber table + cane seating + stone accent + greenery + warm layered lighting.

D

Urban Luxury

Stone table + dark sculptural chairs + metallic details + dramatic pendant.

E

Compact Character

Round extendable table + bench + slim chairs + wall-mounted storage.

F

Modern Classic

Elegant oval table + upholstered chairs + restrained moulding + contemporary lighting.

07 · Proportion

The unusual piece still needs to fit the room

Before choosing a striking dining table or chair, measure the room, doors, windows and circulation routes. Proportion, correctly scaled furniture, storage and clear circulation remain fundamental to a successful apartment interior.

Measure the dining zone Record wall-to-wall dimensions and identify the most practical table position.
Mark chair movement Allow space for chairs to pull out and for people to walk behind them where required.
Check the extended footprint If the table expands, plan the room around the larger configuration too.
Balance visual weight A heavy table may need lighter chairs and storage to prevent the room from feeling dense.
Keep one focal point Let the most unusual furniture piece lead the composition rather than competing with several statement pieces.

“Offbeat furniture works best when the room feels edited: one unexpected shape, a few complementary materials, and enough space for the furniture to breathe.”

Interior A to Z · Modern Apartment Interiors · Delhi NCR
Before you buy

Offbeat dining furniture checklist

Measure first

Check the dining zone, circulation, doors, windows and nearby furniture before selecting the piece.

Choose one hero

Decide whether the table, chairs, sideboard or lighting will be the main statement.

Test comfort

Distinctive furniture still needs to be comfortable for everyday meals and longer gatherings.

Check maintenance

Consider stains, cleaning, children, pets and the actual maintenance routine of the household.

Repeat a material

Use one finish or colour elsewhere in the room to connect unusual furniture with the wider interior.

Leave breathing room

Do not fill every corner. Negative space helps distinctive furniture look intentional rather than crowded.

Frequently asked

Offbeat dining furniture FAQs

What are offbeat dining room furniture styles?

Offbeat dining furniture uses less conventional shapes, combinations or materials, such as curved tables, sculptural chairs, mixed seating, benches, asymmetrical pieces and distinctive storage.

How can I use unusual dining furniture in a modern apartment?

Choose one or two distinctive pieces and keep the surrounding furniture and finishes relatively restrained. This creates character without making a compact apartment feel visually crowded.

Are round dining tables good for apartments?

Round tables can work well in apartments where circulation is tight because they eliminate sharp corners and can support comfortable conversation. The correct size still depends on the room and seating requirement.

Can I mix different dining chairs?

Yes. Mixed chairs can create a more individual dining setting when they share a visual connection such as colour, material, height or overall design language.

What dining furniture works best in a small apartment?

Compact round or extendable tables, benches, slim chairs, wall-mounted storage and multifunctional consoles can help use floor space efficiently.

How do I keep an unusual dining room looking elegant?

Use proportion, repetition and restraint. Let one distinctive table, chair set, light or storage piece become the focal point and coordinate the remaining finishes around it.

Interior A to Z

Make your apartment dining room personal, not predictable

Combine custom furniture, smart space planning, lighting and carefully selected materials to create a dining area with character.

Discuss Your Project

Offbeat Dining Room Furniture Styles For The Modern Apartment: Eclectic Tips Read More »

Modern-Style Dining Room In An Open Kitchen Format: Design Tips

Modern Style Dining Room in an Open Kitchen Format | Interior A to Z
Interior A to Z · Residential Interiors · Delhi NCR · Gurgaon · Noida Call +91 98910 50117
Open Kitchen · Dining · Modern Apartment

Modern Style Dining Room in an Open Kitchen Format

Create a dining space that feels naturally connected to the kitchen without looking like an afterthought. Use furniture, lighting, circulation, materials and subtle zoning to make an open kitchen and dining area work as one modern interior.

Modern dining room connected to an open kitchen in an apartment
The dining area should feel connected to the kitchen while still having its own visual identity.
The open-plan idea

One connected space, two distinct experiences

An open kitchen format can make cooking, dining and everyday conversation feel more connected. The challenge is avoiding a room that looks like one large undefined zone.

The solution is not necessarily a wall. Instead, use furniture placement, lighting, ceiling details, flooring, colour and storage to establish gentle boundaries. Current Interior A to Z guidance for modern homes similarly emphasizes furniture planning, circulation, storage and coordinated lighting as foundational elements of a successful interior.

01 · Layout

Start with the movement between kitchen and table

The most important relationship in an open kitchen dining room is the route between preparation, serving and sitting. The dining table should be close enough to the kitchen to be practical but positioned so chairs do not obstruct working or circulation.

Prepare Kitchen work zone, appliances and preparation surfaces.
Serve Island, counter or clear landing zone for transferring food.
Dine Comfortable table and seating with room to move.
Connect Visual relationship with the living room and rest of the home.
Contemporary open kitchen connected to dining area

Let the kitchen and dining area share a design language

Repeat timber, stone, metal or colour accents so the two zones feel related without becoming identical.

Modern kitchen island beside dining zone

Island as a bridge

A kitchen island can help organize the transition.

Pendant lighting above a contemporary dining table

Dining pendant

Use light to visually anchor the dining zone.

Modern dining table positioned near an open kitchen
02 · Dining furniture

Choose a table that fits the architecture

The dining table becomes the visual centre of the shared kitchen-dining space. Its shape should respond to the room rather than simply following the latest trend.

Round table Useful where soft circulation and conversation are priorities.
Oval table Provides length while reducing the visual hardness of corners.
Rectangular table Efficient for longer rooms and larger family seating.
Extendable table Useful when everyday seating and entertaining requirements differ.
03 · Visual zoning

Define the dining room without closing it off

Open-plan does not mean every zone needs the same finish. Small visual changes can make the dining area feel intentional while preserving the openness of the apartment.

Statement pendant Hang a distinctive fixture above the table to establish a clear centre.
Area rug Use a suitable rug to visually frame the dining furniture where maintenance and clearance allow.
Ceiling detail A subtle ceiling treatment can mark the dining zone without creating a heavy partition.
Feature wall Introduce texture, artwork or a restrained colour shift behind the dining table.
Dining zone visually defined inside an open-plan apartment
04 · Furniture relationship

Coordinate the dining room with the open kitchen

01

Repeat the timber

If the kitchen includes wood or wood-look cabinetry, echo that tone in the dining table, chairs or sideboard.

02

Repeat one accent

Carry a selected metal, stone tone or colour from the kitchen into dining furniture or lighting.

03

Keep profiles compatible

Modern flat-front kitchen cabinetry pairs naturally with clean-lined dining furniture and restrained detailing.

04

Balance visual weight

A visually heavy kitchen island may work better with lighter dining chairs and an open table base.

05

Use texture carefully

Wood, stone, fabric, glass and metal can add depth, but repeating too many finishes can make a compact room feel busy.

06

Let dining have identity

The dining area should complement the kitchen rather than becoming an exact copy of the cabinetry.

Dining storage and crockery unit near open kitchen
05 · Storage

Give the dining area a practical storage role

An open kitchen and dining area benefits from storage that keeps serving pieces, crockery and everyday objects close without making the shared space feel cluttered.

Low sideboard Creates accessible storage while keeping the wall visually light.
Crockery cabinet Useful when dining ware needs dedicated organization and display.
Integrated niches Use selectively for ceramics, artwork and a few decorative objects.
Closed storage Keep less attractive everyday items concealed so the open-plan room stays calm.
06 · Lighting

Use lighting to separate the dining experience

An open kitchen needs functional task lighting, while the dining table benefits from a warmer focal light. Layered lighting allows the room to change from cooking mode to family meals and evening entertaining.

Lighting layerPurposeDining-room application
Task lightingIlluminates kitchen preparation and work surfaces.Under-cabinet lights, focused ceiling fixtures or practical work lighting.
Dining pendantCreates a visual centre over the table.Use a fixture sized and positioned for the table.
Ambient lightingProvides overall comfort after cooking.Recessed, cove or indirect lighting can support the wider room.
Accent lightingAdds depth and highlights selected features.Artwork, shelves, textured walls or display niches.
07 · Small apartments

Make an open kitchen dining area feel larger

Open layouts can visually enlarge an apartment, but furniture still has to be disciplined. The dining table should not become an obstacle between the kitchen and living room.

Choose lighter visual forms Open bases, slimmer chairs and appropriately scaled furniture can preserve sightlines.
Use multifunctional furniture An extendable table can serve everyday needs without requiring a large permanent footprint.
Keep circulation clear Plan the route between kitchen, dining and living areas before adding decorative pieces.
Use vertical storage When wall space is available, tall cabinetry can provide storage without spreading furniture across the floor.
Compact open kitchen and dining arrangement in an apartment
08 · What to avoid

Common open kitchen dining mistakes

Oversized dining table A table that consumes the main circulation path can make the entire apartment feel cramped.
No visual anchor Without a pendant, rug, artwork or other focal element, the dining zone can disappear into the kitchen.
Too many finishes Kitchen cabinetry, countertops, dining furniture and walls should not all compete for attention.
Insufficient storage Open kitchens need organized storage because clutter is visible from the dining area.
Ignoring ventilation Cooking smells and heat should be considered when planning an open kitchen format.
Blocking the kitchen route Chair positions and table placement should be tested against everyday movement.

“The strongest open kitchen dining rooms do not hide the connection between the two spaces. They make that connection feel intentional.”

Interior A to Z · Modern Residential Interiors · Delhi NCR
09 · Design directions

Modern open kitchen dining styles

A

Warm Contemporary

Wood, warm neutrals, stone, soft upholstery and statement lighting create a comfortable modern family setting.

B

Modern Minimal

Simple furniture, restrained colours, concealed storage and clean kitchen cabinetry keep the open plan visually calm.

C

Modern Luxury

Stone textures, premium finishes, sculptural furniture and layered lighting create a more dramatic shared space.

D

Natural Contemporary

Timber, earthy colours, textured fabrics and greenery soften the harder surfaces of an open kitchen.

E

Indian Contemporary

Modern furniture can be combined with selected artwork, brass details, crafted surfaces and warm materials.

F

Compact Urban

Flexible furniture, efficient storage, lighter visual forms and careful zoning suit smaller apartment layouts.

Before finalizing the layout

Open kitchen + dining checklist

Measure the full zone

Include the kitchen, dining area and the circulation route to the living room.

Plan the table first

Test table and chair positions before committing to decorative features.

Coordinate materials

Choose a small group of finishes that can repeat between kitchen and dining.

Layer the lighting

Keep kitchen task lighting separate from the dining focal light where possible.

Plan storage early

Provide dedicated space for crockery, serving pieces and everyday items.

Protect circulation

Make sure chairs, stools, cabinet doors and kitchen movement can coexist comfortably.

Frequently asked

Open kitchen dining room FAQs

What is an open kitchen and dining room format?

An open kitchen and dining room format connects the cooking and eating zones without a full-height separating wall, allowing the spaces to share light, circulation and visual continuity.

How do I separate an open kitchen from the dining area?

Use subtle zoning such as a dining pendant, different flooring or rug, a change in ceiling treatment, a kitchen island, furniture placement or a carefully positioned storage unit.

What dining table works well with an open kitchen?

The right table depends on room size and circulation. Round, oval, rectangular and extendable tables can all work when their proportions leave comfortable movement between the kitchen, dining and living areas.

Should the dining room match the open kitchen?

The dining room does not have to match the kitchen exactly. Repeating one or two materials, colours or finishes can create continuity while allowing the dining furniture to have its own identity.

How can I reduce kitchen clutter in an open-plan dining area?

Plan adequate closed storage, appliance zones, pantry space and clear work surfaces. Keep frequently used items organized and use visual screens or a peninsula where appropriate.

Is an open kitchen good for an apartment?

An open kitchen can make an apartment feel more connected and visually spacious, but the layout should account for cooking habits, ventilation, storage, noise, circulation and the relationship between the kitchen and dining areas.

Interior A to Z

Design the kitchen, dining and living connection as one home

Plan the layout, furniture, storage, lighting and finishes together for an open kitchen dining room that feels cohesive and practical.

Discuss Your Project

Modern-Style Dining Room In An Open Kitchen Format: Design Tips Read More »
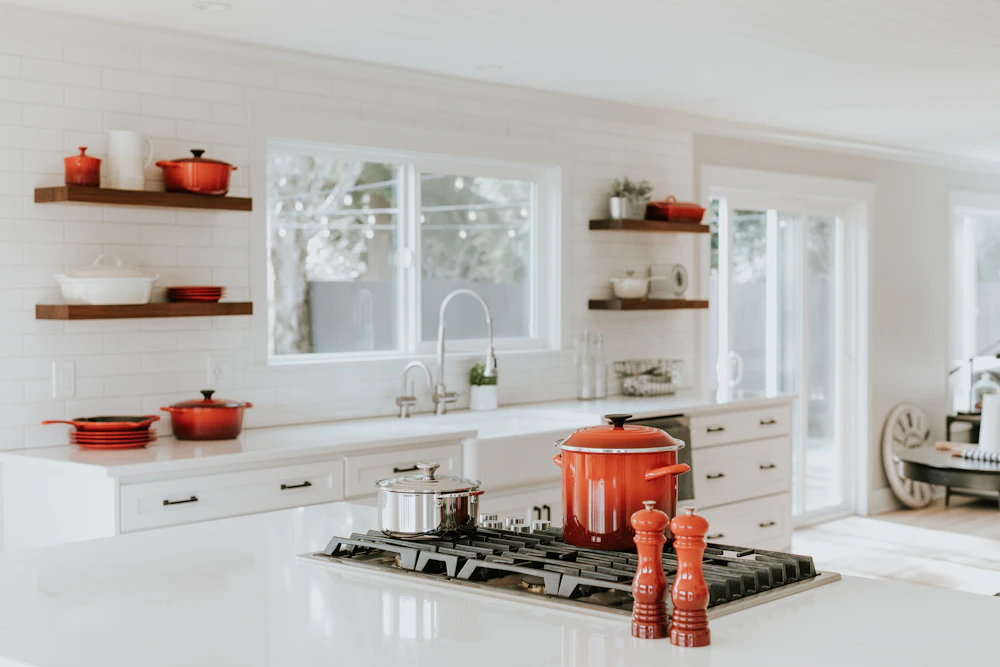
Cafe-Style Dining Room Close To The Kitchen: Small Space Design Tips

Cafe-Style Dining Room Close to the Kitchen | Interior A to Z
Interior A to Z · Residential Interiors · Delhi NCR · Gurgaon · Noida Call +91 98910 50117
Cafe Style · Dining · Kitchen Connection

Cafe-Style Dining Room Close to the Kitchen

Turn the everyday dining corner beside your kitchen into a warm, compact cafe-inspired space with the right table, seating, pendant light, storage and characterful finishes.

Warm modern cafe-style dining area close to a kitchen
A cafe-inspired dining corner can make a compact kitchen-adjacent space feel intentional, social and inviting.
The concept

A little cafe atmosphere, built around everyday life

A dining space beside the kitchen is naturally practical. It shortens the distance between cooking and serving, keeps family conversation connected and can turn an unused corner into one of the most useful areas of the home.

The cafe-style approach adds personality without demanding a large room. Interior A to Z’s dining guidance emphasizes proportion, circulation, comfortable seating, lighting, storage and a coordinated relationship with adjoining kitchens and living areas.

10 compact ideas

Build the cafe look around the kitchen

01 — TABLE

Choose a compact round table

A round table can soften a kitchen-adjacent corner and make movement around the furniture feel less rigid.

02 — BENCH

Add wall-side bench seating

A built-in or freestanding bench can use one wall efficiently while creating a relaxed cafe character.

03 — LIGHT

Hang a warm pendant

A pendant directly above the table creates an instant visual centre and a warmer evening atmosphere.

04 — WALL

Create one memorable wall

Use paint, wallpaper, fluted detailing, artwork or a subtle textured finish instead of decorating every surface.

05 — CHAIRS

Use cafe-inspired chairs

Wood, upholstered, cane or curved chairs can bring a more informal hospitality feel into the home.

06 — COLOUR

Introduce a warm accent

Terracotta, olive, muted blue, cream or warm wood can give the dining corner a distinct identity.

07 — STORAGE

Keep serving items nearby

A slim sideboard or compact crockery unit makes everyday meals easier without filling the room.

08 — DISPLAY

Style one small shelf

Use ceramics, coffee cups, artwork or a few books to create a personal cafe-style display.

09 — GREENERY

Add a touch of green

A compact plant can soften the kitchen-dining transition and add freshness without using much floor area.

10 — MATERIAL

Mix timber and texture

Natural wood, stone, fabric, glass or metal can create visual warmth while keeping the design contemporary.

Modern kitchen and dining area with cafe-inspired styling

Keep the kitchen and dining space visually connected

Repeat one or two finishes between the kitchen and dining furniture so the corner feels designed as part of the home.

Pendant light over compact dining table

One good pendant

Make the table the visual centre.

Compact dining furniture near kitchen

Comfortable seating

Casual does not mean uncomfortable.

Round dining table in a modern cafe-inspired home interior
01 · Furniture

Let the table set the mood

The dining table is the natural starting point. In a compact kitchen-adjacent space, a round or small rectangular table can provide the required seating without dominating the room.

Round Useful for compact layouts where softer circulation is desirable.
Small rectangular Works well against a wall or in a narrow dining zone.
Extendable Provides flexibility when the everyday table needs to accommodate guests occasionally.
Pedestal Reduces the visual and physical interruption of multiple table legs.
02 · Bench seating

Use the wall like a cafe banquette

Bench seating is one of the most useful ways to make a small dining corner feel distinctive. It can use a wall efficiently and create a relaxed visual rhythm.

Built-in bench Can be designed around the exact wall length and available depth.
Storage bench Add drawers or lift-up storage where practical.
Upholstered back Adds comfort and gives the wall a more hospitality-inspired feel.
Bench + chairs Use chairs on the open side for flexibility and easier access.
Bench seating concept for a compact dining corner
03 · The cafe formula

Four elements create most of the atmosphere

Table Compact, comfortable and correctly scaled.
Light Warm pendant or focused fixture above the table.
Backdrop One wall treatment that gives the corner identity.
Seating Chairs or bench seating designed for real everyday use.
Warm dining corner with feature wall and pendant lighting
04 · The backdrop

Create one strong cafe-style wall

The wall behind the dining table can carry much of the personality. Choose one direction and let it remain visually calm around the table.

Warm paint A muted earthy colour can create a relaxed restaurant-like atmosphere.
Wallpaper Use a small-scale or sophisticated pattern when you want more personality.
Wood or fluted detail Add texture and architectural depth without excessive decoration.
Artwork One large artwork can feel more premium than many small objects.
05 · Kitchen connection

Keep the dining corner close enough to be useful

The central idea of placing the dining space close to the kitchen works because it makes everyday serving and family interaction easier. The layout should preserve that convenience while preventing the table from obstructing the kitchen work path.

Planning pointWhat to considerPractical direction
Kitchen routeMovement between counter, dining table and serving area.Keep the main route clear of chair backs and furniture corners.
Table sizeFamily size and available floor area.Choose the smallest comfortable table for daily use.
StorageCrockery, serving pieces and everyday dining items.Use a slim sideboard or compact vertical storage.
LightingDining focus versus kitchen task lighting.Give the table its own pendant or decorative fixture.
Visual connectionRelationship with cabinetry and kitchen finishes.Repeat one material, colour or metal accent.
06 · Small spaces

Make a compact dining corner feel bigger

A cafe-style arrangement works particularly well when space is limited because the design can be intentionally compact. The goal is to make every piece earn its place.

Use slim chairs Keep the seating visually light and easy to move.
Try a bench Use one wall efficiently and tuck the bench beneath the table when possible.
Use a mirror carefully A strategically positioned mirror can reflect light and increase the sense of depth.
Keep the palette simple Fewer competing colours make a small dining corner feel calmer.
Use vertical storage Take advantage of wall height instead of spreading furniture across the floor.
Compact cafe-style dining corner in an apartment
07 · Styling

Choose details that feel like a cafe, not a themed restaurant

A

Warm wood

Timber tables and chairs add warmth and work naturally with modern kitchens.

B

Soft upholstery

Upholstered seating makes the dining corner feel comfortable and residential.

C

Small artwork

Use one or two selected pieces instead of filling the wall with cafe memorabilia.

D

Ceramics

Simple cups, plates or pottery can add character on a small open shelf.

E

Greenery

A plant can soften hard kitchen surfaces and bring freshness to the dining corner.

F

Warm metal

Brass, bronze or dark metal details can complement the pendant and furniture hardware.

08 · Avoid these mistakes

What can make a cafe-style dining corner feel cramped?

Oversized table A table that fills the entire corner leaves no room for comfortable movement.
Too many chairs Choose the seating the room can actually accommodate rather than the maximum possible count.
Heavy storage A deep crockery unit can make a compact kitchen-dining transition feel crowded.
Too many decorative themes Keep the cafe reference subtle and let the room remain a home.
Poor pendant position The dining light should relate to the table rather than simply the room centre.
Blocked kitchen circulation Check chair movement and serving paths before finalizing the layout.

“The best cafe-style dining corner feels relaxed enough for morning coffee, practical enough for family meals and refined enough for guests.”

Interior A to Z · Compact Dining Interiors · Delhi NCR
Design checklist

Plan your cafe-style dining corner

Measure first

Record the kitchen-to-dining dimensions, wall lengths, doors and circulation paths.

Select the table

Choose the correct shape and size before adding decorative elements.

Plan seating

Decide between chairs, bench seating or a combination according to the room.

Choose the pendant

Make the dining table the visual centre with a well-proportioned light.

Design the backdrop

Select one wall treatment that gives the corner its identity.

Keep it practical

Make sure cleaning, serving, storage and everyday circulation remain easy.

Frequently asked

Cafe-style dining room FAQs

What is a cafe-style dining room close to the kitchen?

It is a compact, relaxed dining area positioned near the kitchen and designed to feel like a small neighbourhood cafe, often using a compact table, comfortable seating, warm lighting and a distinctive wall or material treatment.

Is a round dining table good for a small dining area near the kitchen?

A round table can work well in selected compact layouts because it has no sharp corners and can support easier movement around the dining zone. The correct diameter still depends on the available space and seating requirement.

Can I use a dining bench in a cafe-style dining room?

Yes. A bench can make efficient use of one wall, provide flexible seating and reinforce the casual cafe-inspired character.

How do I create a cafe feel at home?

Use a compact table, comfortable chairs or a bench, warm pendant lighting, one attractive wall treatment, selected artwork or plants and a restrained palette of materials and colours.

Should the cafe-style dining area be separated from the kitchen?

Not necessarily. It can remain open to the kitchen or be lightly separated with furniture, a half-height element, glass, a change in flooring or visual zoning.

How can I make a small dining area look premium?

Focus on proportion, one strong focal element, good lighting, comfortable seating, coordinated materials and clean storage rather than adding many decorative objects.

Interior A to Z

Create a dining corner that feels like your favourite cafe

Plan your kitchen-adjacent dining space around the real dimensions of your home, with comfortable furniture, practical storage, warm lighting and a refined visual identity.

Discuss Your Project

Cafe-Style Dining Room Close To The Kitchen: Small Space Design Tips Read More »

Boho-Style Dining Room Next To Large Windows: Design & Light Tips

Boho-Style Dining Room Next to Large Windows | Natural Light Guide
Dining Room • Natural Light • Boho Interiors

Boho-Style Dining Room Next to Large Windows

Let daylight become part of the dining experience. Build a relaxed bohemian dining space around generous windows, natural textures, comfortable furniture, greenery and warm evening lighting.

The idea

Make the window the quiet focal point.

A dining table placed near large windows can feel brighter, more open and more connected to the outdoors. The original concept behind this page combines a bohemian mood with natural daylight, a relaxed dining setting and practical display or storage.

Rather than filling the window wall with furniture, let the view breathe. Build the room with warm timber, woven textures, plants, soft upholstery and a few expressive pieces. The result should feel collected rather than overly decorated.

Warm dining interior with natural materials and daylight
Natural light gives a boho dining room an easy daytime atmosphere.
Design foundations

8 elements that make the look work

Boho style is less about matching every piece and more about combining natural materials, softness, personality and comfortable proportions.

Natural wood dining furniture in a warm interior

1. Natural wood

Choose a timber or wood-look table with visible warmth rather than a highly formal finish.

Textured neutral interior details

2. Layered texture

Mix woven details, linen-like upholstery, cane, jute and tactile wall finishes to create depth.

Indoor greenery and warm home styling

3. Greenery

Plants soften the hard lines of a dining set and strengthen the connection with the bright window.

Bohemian-inspired home accessories and textures

4. Collected décor

Use ceramics, art, baskets and selected objects instead of filling every surface with accessories.

Warm pendant lighting in an elegant interior

5. Warm evening light

A pendant above the table shifts the atmosphere from bright daytime dining to intimate evening meals.

Neutral dining room with soft furnishings

6. Soft seating

Upholstered chairs or a bench can make long meals more comfortable while adding colour and texture.

Windows first

Use daylight without letting glare take over.

Large windows are a major asset, but direct sun can make a dining space uncomfortable at certain times of day. Layer the window with a treatment that can filter light when necessary.

Sheer layerSoftens harsh daylight while keeping the room bright.
Woven blindAdds texture and allows controlled privacy.
Full curtainsUseful for stronger glare and evening privacy.
Clear circulationKeep handles, panels and openings easy to reach.
Bright contemporary interior beside large windows
Furniture planning

Choose furniture that leaves the window visible.

The dining table should feel anchored in the room without blocking the strongest visual connection to the outdoors. Start with the table footprint, then check chair pull-out space and the path between the dining area, kitchen and living room.

Round tableUseful where circulation needs to soften around corners.
Rectangular tableWorks well when the room has a longer proportion or needs more seats.
Bench seatingCan reduce visual clutter and work efficiently against a wall.
Extendable tableProvides a smaller everyday footprint with flexibility for guests.
Dining table and seating in a warm modern home
Boho palette

Build the palette from the view, not against it.

Natural daylight makes earthy colours especially effective. Start with a quiet base and introduce stronger tones through upholstery, artwork, ceramics or a single accent wall.

BaseWarm white, cream, sand, beige and soft stone.
NatureOlive, sage, muted green and botanical tones.
EarthTerracotta, clay, rust and warm brown accents.
MaterialWood, cane, rattan, linen-like fabrics, jute and ceramic.
Earthy neutral interior palette with natural textures
Storage & styling

Keep the room relaxed, but give everyday items a home.

A boho dining room can still be highly practical. The trick is to combine concealed storage with a small amount of open display.

Crockery unit

Use closed storage for daily dinnerware and a small display zone for selected ceramics or glassware.

Sideboard

A low sideboard can store serving pieces while giving you a surface for art, plants or a sculptural lamp.

Open shelf

Use one restrained shelf for baskets, books, ceramics or small collected objects.

Dining pendant light creating a warm evening focal point
Lighting

Let the room change character after sunset.

Daylight should not be the only lighting strategy. A pendant or sculptural light over the table creates the evening focal point while softer ambient lighting keeps the surrounding room comfortable.

Dining pendantPosition it in relation to the table, not simply the ceiling centre.
Ambient lightUse comfortable general illumination around the room.
Accent lightHighlight artwork, plants or a feature wall selectively.
Warm toneA warmer evening atmosphere complements wood and woven textures.
Open-plan homes

Connect the dining room to the kitchen and living area.

In many Delhi NCR homes, the dining zone sits between the kitchen and living room. Boho styling can remain distinctive while still sharing a visual language with adjacent spaces.

Kitchen connectionKeep the serving route direct and avoid placing large storage units where they obstruct movement.
Living connectionRepeat one or two materials, colours or textures so the dining area feels part of the larger home.
Window connectionProtect the sightline to the windows instead of creating a tall visual barrier beside them.
Lighting connectionUse coordinated colour temperature while giving the dining table its own focal fixture.
A simple formula

Natural light + texture + comfort + personality.

The strongest boho dining rooms do not need dozens of decorative pieces. They need a clear composition, comfortable furniture and a few materials that feel good together.

For a premium but calm result

Keep the window wall visually light, choose one strong dining-table statement, add tactile seating, introduce greenery and finish with warm layered lighting.

Avoid these mistakes

What can weaken a bright boho dining room?

Blocking the windowsLarge cabinets or oversized furniture can reduce the main advantage of the room.
Too much patternLayered boho style works better when strong patterns have enough visual breathing room.
Ignoring glarePlan adjustable window treatments before finalising the furniture and décor.
Wrong table scaleA beautiful table can still fail if chairs cannot pull out comfortably.
Cold lightingVery cool evening light can fight the warmth of wood and natural textures.
Decorative clutterKeep a few meaningful objects rather than filling every surface.
Delhi NCR homes

Boho dining design for Delhi, Gurgaon and Noida homes.

The same idea can be adapted to apartments, builder floors, independent houses and larger residences. Furniture scale, storage and window treatments should follow the actual floor plan.

Delhi

Use compact furniture and controlled storage where dining areas share space with living rooms or kitchens.

Gurgaon

Larger apartments and premium homes can use statement tables, layered lighting and stronger material contrasts.

Noida

Balance natural daylight with practical circulation, compact storage and furniture suited to apartment proportions.

Plan before you buy

Boho dining room checklist

Measure firstRecord window width, sill height, doors, circulation and ceiling height.
Choose the tableConfirm seating and clearance before selecting decorative pieces.
Plan window controlDecide how the room will handle strong morning or afternoon sunlight.
Layer textureCombine wood, fabric, woven elements and plants without overcrowding.
Plan storageDecide where crockery and serving items will live before adding décor.
Finish with lightingUse the table light as the evening focal point and keep the rest softer.
FAQs

Boho dining room questions

How do I design a boho-style dining room next to large windows?

Keep the window area visually open, then layer a natural-material table, comfortable seating, warm lighting, plants, textiles and selected wall décor around the available daylight.

Is a large mirror useful beside a bright dining room?

A carefully positioned mirror can reflect daylight and add depth, but it should be placed so it does not create distracting glare during daytime meals.

What furniture works well for a boho dining room?

Natural wood tables, woven or upholstered chairs, benches, cane details and relaxed silhouettes can work well when their proportions suit the room.

How can I control glare near large dining windows?

Use adjustable curtains, woven blinds or layered window treatments that filter direct sunlight while preserving the room’s natural brightness.

What colours suit a boho dining room with natural light?

Warm neutrals, sand, beige, terracotta, muted green, clay and natural wood tones can complement daylight and create a relaxed bohemian atmosphere.

Can this dining style work in a Delhi NCR apartment?

Yes. Adapt the approach to the actual floor plan by adjusting furniture scale, window treatments, storage and circulation.

Create a dining room shaped by light.

Share your dining-room dimensions, window layout, seating needs and preferred style with Interior A to Z.

Discuss Your Dining Room

Boho-Style Dining Room Next To Large Windows: Design & Light Tips Read More »

Indian-Style Dining Room In A Combined Living Room: Design & Layout Tips

Indian-Style Dining Room in a Combined Living Room | Design Guide
Indian Interiors • Open-Plan Living • Dining Design

Indian-Style Dining Room in a Combined Living Room

Create a dining zone that feels distinctly Indian without making the combined living room feel divided. Use warm wood, thoughtful zoning, traditional details, practical storage and carefully planned lighting.

The design challenge

Give the dining area its identity without building a wall.

When the living and dining rooms share one large space, the dining area needs a clear visual identity while remaining connected to the rest of the home.

The original page focuses on creating a clear demarcation, simple décor, a classic wooden dining table and traditional storage. That idea can be developed into a more complete Indian-contemporary composition: warm materials, comfortable seating, a focal wall and practical circulation.

The goal is not to make the dining area look like a separate room. It should feel like a natural chapter within the larger living space.

Elegant combined living and dining room with warm wood furniture
The dining table can become the transition point between living and dining zones.
Indian-contemporary direction

6 elements that create warmth without visual clutter

Indian-style does not have to mean heavily traditional. A few carefully chosen materials and details can give a modern combined room a distinctly Indian character.

Warm wooden furniture in a refined home interior

Warm wooden table

Use wood as the anchor material. A simple profile can feel contemporary while retaining the warmth associated with Indian homes.

Elegant dining furniture with natural textures

Comfortable seating

Choose chairs or a bench that support everyday family meals and still sit comfortably within the combined room.

Decorative interior with artwork and collected details

Selected Indian details

Introduce artwork, textiles, ceramics, brass, carved details or handcrafted objects selectively rather than everywhere.

Pendant lighting over a dining table

Dedicated lighting

A pendant or chandelier above the dining table creates a visual boundary without needing a physical partition.

Dining area with natural materials and warm styling

Traditional storage

A crockery unit or sideboard can provide practical storage while adding an architectural focal point.

Open-plan home interior with connected living spaces

Connected palette

Repeat selected wood, fabric and colour tones from the living room so both areas feel intentionally designed together.

Visual zoning

Define the dining room with design, not a heavy partition.

A combined living room works best when the dining zone is easy to identify but remains visually open. The table, lighting and wall behind it can create a strong boundary while preserving the larger room.

Pendant light Creates a visual ceiling marker directly above the table.
Feature wall Gives the dining area its own background and focal point.
Rug Can visually anchor the table when the room proportions allow it.
Sideboard Creates a low transition element without blocking views.
Open-plan dining and living area with layered interior details
Indian material palette

Use familiar materials in a cleaner modern composition.

An Indian dining room can feel contemporary when traditional materials are given breathing space. Instead of combining every Indian motif at once, choose a small material story and repeat it across the room.

Natural wood Use timber tones for the table, sideboard or selected wall elements.
Brass Introduce brass through lighting, hardware or a small decorative accent.
Textiles Use cushions, runners or artwork to bring colour and craft into the space.
Stone & ceramic Use tactile surfaces for selected décor, tabletops or feature details.
Warm contemporary interior with natural wood and earthy colours
Furniture planning

Start with the table, then design the room around it.

The dining table is the functional centre of the zone. Its size should be based on the number of regular users, entertaining needs and the available circulation around the chairs.

4-seater Useful for compact apartments or dining corners where flexibility and circulation are priorities.
6-seater A practical family format for many combined living-dining layouts.
8-seater Better suited to larger rooms where chair movement and serving circulation can remain comfortable.
Extendable Useful when everyday space is limited but the household regularly hosts additional guests.
Dining table positioned within a larger open living space
Crockery & storage

Make traditional storage part of the architecture.

The source page specifically highlights a large china cabinet for traditional appeal. In a modern combined room, the same idea can be interpreted through a cleaner crockery unit, sideboard or integrated display wall.

Full crockery unit

Useful in a larger dining zone where dinnerware, serving pieces and display items need dedicated storage.

Low sideboard

Creates storage without becoming a tall visual barrier between the living and dining areas.

Glass display

Can showcase selected ceramics or traditional pieces while keeping the overall composition controlled.

Warm earthy dining interior with decorative wall styling
Feature wall

Give the dining zone one memorable backdrop.

A combined room benefits from a clear focal point. The wall behind the dining table can carry the Indian character while the rest of the room remains calm.

Wood panelling Adds warmth and architectural depth.
Indian artwork Introduces cultural character without filling the room with motifs.
Textured finish Creates subtle depth behind a simple dining set.
Mirror Can add visual openness when positioned to avoid glare and clutter.
Living + dining flow

Keep the two zones connected but clearly readable.

Current Interior A to Z dining guidance recommends coordinating colours, materials and lighting while maintaining clear movement between living, dining and kitchen areas.

Furniture alignment Place the dining set so it creates a natural transition rather than narrowing the main living-room walkway.
Colour continuity Repeat one or two colours from the living room in dining upholstery, artwork or accessories.
Material repetition Repeat selected wood, metal or fabric finishes to make the combined room feel intentional.
Lighting zones Give the dining table its own fixture while keeping the living room on a separate lighting layer.
Kitchen connection Keep the route from kitchen to dining table direct enough for serving and everyday family use.
Design principle

Separate the function, not the feeling.

The best combined living-dining rooms do not need walls to feel organized. They use proportion, lighting, furniture placement and material repetition to make each zone understandable.

A balanced Indian-contemporary formula

Wooden dining table + comfortable seating + one strong Indian-inspired feature + practical crockery storage + warm lighting + clear circulation.

Design process

Plan the combined room in five stages.

01

Measure

Record room dimensions, doors, windows, columns and kitchen connections.

02

Zone

Decide where living, dining and circulation paths should sit.

03

Furnish

Select table, seating, storage and supporting furniture to scale.

04

Style

Coordinate Indian details, colours, materials, artwork and wall treatment.

05

Light

Layer dining, living and accent lighting so each zone has its own atmosphere.

Avoid these mistakes

What can make a combined dining room feel crowded?

Oversized table A large table can consume circulation space and visually dominate a compact living room.
Tall storage in the wrong place A full-height unit can block sightlines and make the combined room feel smaller.
Too many Indian motifs Choose a few meaningful details rather than mixing multiple competing patterns.
One light for everything A single ceiling light rarely gives both living and dining zones the right atmosphere.
No transition Without a focal wall, pendant or furniture arrangement, the dining zone can disappear into the living room.
Blocked circulation Always test chair pull-out space and the walking route around the dining table.
Delhi NCR homes

Indian-style combined living and dining for Delhi, Gurgaon and Noida.

The approach can be adapted to apartments, builder floors, independent houses and larger homes. Interior A to Z currently positions dining design around space planning, furniture, storage, lighting and coordination with adjoining rooms.

Delhi

Use efficient furniture, compact storage and a strong focal wall where living and dining share limited floor area.

Gurgaon

Contemporary apartments and larger homes can support statement dining furniture, custom storage and layered Indian details.

Noida

Balance family dining needs with open-plan circulation, practical storage and a coordinated modern Indian palette.

FAQs

Indian-style combined living and dining questions

How do I separate a dining area from a combined living room?

Use furniture placement, a dedicated pendant, a rug, a feature wall, ceiling detail or a coordinated material change to visually define the dining zone without blocking circulation.

What furniture suits an Indian-style dining room?

Wooden dining tables, comfortable chairs or benches, a sideboard and a crockery unit can work well, with the scale selected according to the combined room.

Can a traditional Indian dining look work in a modern living room?

Yes. Use selected Indian elements such as warm wood, handcrafted details, artwork, brass accents or traditional patterns while keeping the overall furniture and layout contemporary.

How can I keep a combined living and dining room from looking crowded?

Choose furniture to scale, maintain clear walking routes, limit large storage pieces and use one or two strong focal points instead of decorating every surface.

Is a crockery cabinet useful in a combined living-dining room?

It can be useful when dinnerware and serving items need dedicated storage. A compact or built-in unit can reduce clutter while maintaining a cohesive look.

What lighting works best for a combined living and dining room?

A dedicated pendant or chandelier above the dining table can define the dining zone, while the living room uses its own ambient and accent lighting.

Design the dining zone around your family.

Share your combined living-room dimensions, seating needs, storage requirements and preferred Indian style with Interior A to Z.

Discuss Your Home

Indian-Style Dining Room In A Combined Living Room: Design & Layout Tips Read More »

How To Plan The Dining Room Style Design For Your Home: A Complete Guide

How to Plan Dining Room Style & Design for Your Home | Guide
Dining Room Planning • Style • Layout • Interiors

How to Plan the Dining Room Style & Design for Your Home

Build a dining room that looks beautiful and works every day. Start with the layout, choose the right table and seating, then layer lighting, storage, colour, wall design and décor around the way your family actually uses the space.

Start with function

Plan the room before you choose the décor.

A successful dining room is not simply a collection of a table, chairs and attractive accessories. The layout needs to support sitting, serving, conversation and movement while fitting naturally into the wider home.

Interior A to Z’s current dining guidance puts furniture proportions, circulation, lighting, storage, wall treatment and coordination with adjoining spaces at the centre of the design process.

That makes the dining table the practical starting point. Once its size and position are clear, the remaining decisions become much easier.

Elegant dining room planned around a central dining table
Start with proportion and movement, then build the visual character.
The planning framework

7 decisions to make before buying furniture

A clear brief prevents expensive furniture and décor choices from working against the room.

1. Measure the room

Record length, width, ceiling height, doors, windows, columns and connections to the kitchen or living room.

2. Count regular users

Decide how many people normally dine together and how often you host larger gatherings.

3. Map circulation

Check where people walk, where chairs pull out and how serving will move through the room.

4. Define storage

List crockery, serving pieces, table linen, glassware and other items that need a home.

5. Choose the mood

Decide whether you want modern, luxury, minimal, warm natural, contemporary or Indian-contemporary character.

6. Set a budget

Separate furniture, storage, lighting, wall treatments, décor and execution so priorities remain clear.

Layout first

Choose the dining table according to the room, not the catalogue.

The table is the functional and visual centre of the dining space. Its shape should respond to room proportions and circulation rather than simply personal preference.

Rectangular Efficient for medium and larger rooms and useful for family seating.
Round Can soften corners and work well in selected compact layouts.
Oval Combines a longer seating capacity with softer edges.
Extendable Allows a smaller everyday footprint with extra seating when required.
Dining table and chairs in a carefully proportioned interior
Furniture planning

Comfort matters as much as appearance.

Dining furniture needs to support real life. Check seat height, back support, table height, chair movement and the amount of space needed behind each chair.

Dining chairs Prioritise comfortable seating and enough clearance for people to sit and move easily.
Bench seating Can work well along a wall and may reduce visual clutter in selected layouts.
Sideboard Adds serving storage without necessarily creating a tall visual barrier.
Crockery unit Useful when dinnerware and serving pieces need dedicated storage and display.
Comfortable dining chairs and natural furniture materials
Style direction

Choose a style that belongs to the rest of your home.

The dining room should feel like part of the same design story. It can have its own focal elements, but completely disconnected furniture and finishes can make an open-plan home feel fragmented.

Modern Clean forms, restrained colours and contemporary lighting.
Luxury Refined materials, statement lighting and customized furniture or storage.
Minimal Essential furniture, uncluttered surfaces and calm visual proportions.
Warm natural Wood, soft colours, natural textures and comfortable lighting.
Indian contemporary Modern planning combined with selected Indian materials, artwork, colours and craft details.
Layered dining room styling with artwork and natural textures
Lighting design

Make the dining table the evening focal point.

A well-positioned pendant or chandelier can define the dining zone while layered lighting keeps the rest of the room comfortable.

Statement pendant

Position the main fixture in relation to the table rather than simply centring it in the ceiling.

Ambient lighting

Provide comfortable general illumination so the dining room remains practical beyond meal times.

Accent lighting

Highlight artwork, a feature wall, display shelving or architectural details selectively.

Storage & walls

Give the dining room one useful focal wall.

The wall behind the table can combine storage and visual identity. The treatment should complement the furniture rather than compete with it.

Wood panelling Adds warmth and architectural depth.
Wallpaper Creates pattern and personality when used selectively.
Artwork A large piece can provide a clear focal point without covering every wall.
Mirror Can add depth and reflect available light when positioned carefully.
Sideboard Combines serving storage with a surface for décor.
Built-in storage Uses awkward walls efficiently and keeps dining essentials organized.
Dining wall treatment with storage and decorative styling
Open-plan living and dining room with coordinated furniture
Open-plan planning

Connect the dining room to the living room and kitchen.

Many modern homes combine these functions. Instead of separating them completely, use design elements to establish visual zones while maintaining a shared language.

Coordinate materials Repeat selected wood, metal, fabric or finish details.
Use lighting as zoning Give the dining table its own pendant or chandelier.
Keep circulation clear Avoid large furniture where it interrupts movement.
Share a colour family Let dining have its own focal colours while remaining connected.
Small dining rooms

Use scale to make a compact dining area feel generous.

Small rooms benefit from restraint. The aim is comfortable seating and useful storage without filling every available surface.

Compact table

Choose a size that leaves practical movement around chairs and nearby doors.

Bench seating

A wall-side bench can make efficient use of one side of the dining area.

Vertical storage

Use wall-mounted or built-in storage instead of adding several freestanding pieces.

One feature wall

Concentrate visual detail in one location instead of making the entire room busy.

Strategic mirror

Use a mirror where it adds depth without creating glare or visual confusion.

Lightweight furniture

Slim profiles can make the floor area feel more open than bulky furniture.

A practical rule

Design the dining room around how you eat, host and move.

Beautiful interiors become much easier when the functional decisions are made first. Style should enhance the experience rather than make everyday use difficult.

Before buying anything

Measure the room, mark the table footprint with tape, test chair movement, identify storage needs and decide where the main light will sit.

Budget planning

Break the dining-room budget into visible priorities.

Published Interior A to Z planning references show that dining-room costs can vary substantially with furniture, storage, lighting, materials and customization. Use broad planning ranges only until the actual specification is known.

Simple refresh Existing or ready-made furniture, paint, lighting updates and limited décor.
Moderate update New dining furniture, improved lighting, selected wall treatment and storage.
Complete package Coordinated furniture, feature wall, lighting, storage and finishing details.
Premium custom Bespoke furniture, premium finishes, detailed lighting, custom crockery units and designer décor.
The process

Plan the dining room in six clear stages.

01

Measure

Record dimensions, doors, windows and ceiling height.

02

Brief

Define users, hosting needs, storage and style.

03

Layout

Position the table, chairs, storage and circulation.

04

Design

Select materials, colours, walls and lighting.

05

Review

Check proportions, usability and budget before execution.

06

Execute

Coordinate approved furniture, finishes and interior work.

Avoidable mistakes

Common dining-room design problems to catch early.

Oversized table A table that is too large can make circulation uncomfortable.
Wrong light position The main fixture should relate to the table, not merely the room centre.
Insufficient storage Without dedicated storage, dinnerware and serving items can quickly create clutter.
Too much décor A clear focal point is usually stronger than several competing decorative areas.
Poor chair clearance Test how chairs move before finalizing the table position.
Disconnected style Coordinate the dining room with adjacent living and kitchen finishes.
Delhi NCR

Dining room planning for Delhi, Gurgaon and Noida homes.

Dining areas vary from compact apartment corners to dedicated rooms in villas and independent homes. The design should respond to the actual floor plan, family needs, furniture requirements and overall interior style.

Delhi

Prioritise efficient furniture, practical storage and clear circulation in apartments, builder floors and independent homes.

Gurgaon

Larger apartments and villas can support statement dining furniture, custom storage and more detailed wall treatments.

Noida

Balance family dining needs with apartment proportions, open-plan layouts and coordinated modern finishes.

FAQs

Dining room style and design questions

How should I start planning my dining room design?

Start with measurements, the number of regular users, circulation requirements and the relationship with the living room or kitchen. Then choose the dining table and plan the rest of the room around it.

What should I consider when choosing a dining table?

Consider room proportions, family size, number of guests, circulation, table shape, maintenance and whether you need an extendable option.

How do I choose a dining room style?

Choose a style that complements the architecture and existing rooms of your home. Modern, contemporary, luxury, minimalist, warm natural and Indian-contemporary styles can all be adapted to different layouts.

What lighting is best for a dining room?

A pendant or chandelier positioned above the dining table can create a focal point. General and accent lighting can be layered around it according to the room.

How can I plan a small dining room?

Use appropriately sized furniture, compact or round tables where suitable, bench seating, wall-mounted storage and a clear circulation path.

Should the dining room match the living room?

It does not need to be identical, but repeating selected colours, materials, furniture language or lighting details can create visual continuity, especially in open-plan homes.

How much does dining room interior design cost?

Cost depends on furniture, storage, lighting, wall treatments, room size, materials and execution scope. A simple refresh can cost much less than a fully customized dining interior.

Plan a dining room that works every day.

Share your room dimensions, seating requirements, storage needs and preferred design style with Interior A to Z.

Discuss Your Dining Room

How To Plan The Dining Room Style Design For Your Home: A Complete Guide Read More »

Is Calling in a Professional Worth It? DIY vs. Pro Renovation Guide

Is Calling in a Professional Worth It? | DIY vs Pro Renovation
Renovation Planning • DIY • Professional Interior Design

Is Calling in a Professional Worth It?

DIY can make sense for some home projects. For larger renovations, the real question is not simply whether a professional costs more—it is whether planning, coordination, technical knowledge and risk management justify the involvement for your particular scope.

The real question

DIY versus professional is a project-scope decision.

The original page asks whether calling in a professional is worth it and highlights three practical issues: risk, hidden DIY costs and strategic project planning.

A useful way to make the decision is to separate low-risk cosmetic work from projects involving multiple trades, custom furniture, technical installations, detailed planning or significant coordination.

The goal is not to assume that professional help is always necessary. It is to understand what you are taking on yourself—and where specialist input can reduce uncertainty.

Professionally planned contemporary home interior
The right level of professional involvement depends on the work your home actually needs.
Start here

5 questions to answer before deciding

These questions turn a vague “DIY or professional?” decision into a practical project assessment.

How complex is the work?

Painting a room is different from coordinating a kitchen, wardrobes, electrical changes, ceiling work and custom furniture.

What skills do you have?

Be realistic about design, measurement, construction, material selection and contractor-management skills.

How much time can you give?

DIY replaces part of the professional fee with your own planning, purchasing, supervision and problem-solving time.

What could go wrong?

Consider safety, material errors, incorrect measurements, rework, delays and coordination failures.

What result do you need?

A quick refresh and a fully coordinated home renovation have very different requirements.

Who manages execution?

Decide who will coordinate contractors, deliveries, measurements, approvals and changes before work begins.

DIY vs professional

Compare the work involved—not just the price.

A professional fee is only one part of the equation. DIY also has costs in time, tools, mistakes, coordination and rework.

FactorDIY approachProfessional involvement
Planning You create the brief, measurements, layout and decisions. A designer or professional can structure the brief, layouts and design decisions.
Materials You research specifications, suppliers and quantities. Professional guidance can help compare materials and coordinate specifications.
Execution You coordinate trades or manage contractors yourself. Depending on the contract, execution and coordination may be managed for you.
Time Requires your own recurring involvement throughout the project. Professional coordination can reduce the amount of owner-managed work.
Risk You carry more responsibility for errors, rework and coordination. Scope, documentation and professional responsibilities can be defined in the agreement.
Flexibility Direct control over decisions and timing. More structured process, often with agreed approvals and change procedures.
Hidden DIY costs

Your own time is part of the renovation budget.

The original article highlights tools, protective equipment and the possibility that mistakes can change the economics of DIY. Add the less visible costs: repeated supplier visits, delivery coordination, incorrect quantities, rework and time spent solving problems.

Tools Specialist tools may be needed for work you rarely perform.
Waste Incorrect cuts or quantities can turn inexpensive materials into expensive replacements.
Rework A mistake in measurement or installation can affect later stages.
Time Planning, purchasing and supervision can consume evenings and weekends.
Home renovation planning and material selection
When DIY can fit

Some projects are naturally easier to manage yourself.

For low-risk work that does not require specialist technical knowledge, DIY can be a practical choice when you have the time, tools and confidence to complete it safely.

Painting Suitable when surface preparation and access are straightforward.
Simple décor Artwork, accessories and styling can often be handled independently.
Furniture assembly Ready-made pieces can be assembled when instructions and tools are appropriate.
Soft updates Textiles, cushions, rugs and small decorative changes can refresh a room without major construction.
Simple home styling and decorative interior updates
When complexity rises

Professional coordination becomes more relevant when several systems meet.

A renovation becomes harder to manage when design decisions affect electrical work, plumbing, ceilings, flooring, carpentry, kitchens, wardrobes, lighting and multiple contractors.

Multiple trades Several contractors need to work in the correct sequence.
Custom furniture Measurements, drawings, materials and installation need coordination.
Space planning Layout decisions can affect electrical points, storage and circulation.
Large scope More rooms create more decisions, dependencies and opportunities for delay.
Technical changes Electrical, plumbing or structural work should be approached with appropriate qualified expertise.
Turnkey execution Owners may prefer a single coordinated scope rather than managing many vendors themselves.
Detailed residential interior with coordinated finishes
What a professional may add

Understand the deliverables before paying for a service.

“Professional” can mean different things. Ask exactly what is included in the proposed scope.

Space planning

Furniture layouts, circulation and functional zoning based on the actual room dimensions.

Design development

Concepts, materials, colours, finishes, lighting and visual direction.

Drawings

Depending on scope, plans, elevations, furniture details or other documentation for execution.

Material selection

Guidance on finishes, hardware, surfaces and specifications appropriate to the project.

Vendor coordination

Communication among contractors, suppliers, carpenters and other execution teams.

Project planning

A structured sequence for approvals, procurement, execution and payments.

Questions to ask

Do not compare professionals on price alone.

A quotation is useful only when you can see what the number includes.

Scope Which rooms, furniture, finishes and execution activities are included?
Materials Are brands, grades, thicknesses, hardware and finish specifications documented?
Drawings What design drawings or visualisations will you receive?
Timeline What is the expected sequence, and which dependencies can affect it?
Payments When are design fees, material payments, execution payments and final balances due?
Changes How are additions, omissions and design revisions handled?
Warranty What warranty, defect-resolution or post-completion support is included?
Responsibility Who is responsible for procurement, site supervision, contractor coordination and approvals?
Insurance & agreements

Get responsibilities in writing.

The original page points to insurance and guarantees as important protections when qualified professionals are involved. The exact protection available depends on the professional, jurisdiction, contract and nature of the work.

Before work starts

Keep the scope, drawings, specifications, exclusions, payment schedule, change procedure, timeline assumptions and applicable warranty or service terms documented.

A practical decision framework

Match professional involvement to project complexity.

01

Refresh

Décor, paint or simple furniture changes may need limited professional input.

02

Single room

A room with custom furniture or detailed design may benefit from focused design help.

03

Multi-room

Several rooms increase coordination, material and scheduling decisions.

04

Renovation

Construction, electrical, plumbing or structural changes raise technical complexity.

05

Turnkey

A full-home project can involve design, procurement, execution and many vendors.

Delhi NCR projects

For Delhi, Gurgaon and Noida homes, define the scope before choosing the service.

Interior A to Z’s current site covers residential interiors, modular kitchens, turnkey interiors and location-specific services across Delhi NCR, Gurgaon and Noida. The appropriate service depends on the actual project requirements.

2 BHK

Useful to define whether you need one-room design, complete home interiors or turnkey execution.

3 BHK

Multiple rooms, wardrobes, kitchen, lighting and furniture can create more coordination requirements.

4 BHK & larger

Large homes often require a clearer project structure, procurement plan and execution coordination.

Decision checklist

Before you call a professional, prepare these 10 things.

1. Property type Apartment, builder floor, independent house or villa.
2. Floor plan Basic dimensions, room sizes and important openings.
3. Scope Which rooms and services actually need work?
4. Budget A working range rather than an unrealistic single number.
5. Timeline When does the home need to be usable?
6. Style Collect a small reference set rather than dozens of unrelated images.
7. Storage List what needs to be stored before designing cabinets.
8. Priorities Identify the three or four things that matter most.
9. Existing items Note furniture, appliances or décor you intend to retain.
10. Questions Prepare questions about scope, materials, payments and execution.
FAQs

DIY versus professional renovation questions

Is hiring an interior design professional worth it?

It depends on project complexity, your available time, technical requirements, budget and willingness to manage contractors and decisions. Simple cosmetic work may be suitable for DIY, while complex multi-trade renovations often require more coordination.

When is DIY home renovation reasonable?

DIY can be practical for low-risk cosmetic work when you have the required skills, tools and time and the work does not involve structural, electrical, plumbing or other specialist requirements.

What hidden costs should I consider before doing a renovation myself?

Consider tools, protective equipment, material waste, delivery, mistakes, rework, contractor coordination and the value of your own time.

What does an interior designer or professional help with?

Depending on the service, a professional may help with space planning, design concepts, drawings, material selection, quotations, vendor coordination, execution and project scheduling.

How should I compare interior design quotations?

Compare the scope, materials, quantities, brands or specifications, exclusions, execution responsibilities, payment schedule, timeline, revision policy and warranty or service terms rather than comparing only the final price.

Is professional help useful for a 2 BHK or 3 BHK renovation?

It can be useful when several rooms, custom furniture, kitchens, wardrobes, electrical work, ceilings or other trades need to be coordinated. The appropriate level of professional involvement depends on the actual scope.

What should I ask before hiring an interior professional?

Ask about relevant project experience, scope, deliverables, fees, materials, execution responsibility, timeline, payment terms, change orders, warranty and how communication will be handled.

Start with the scope, then choose the right level of help.

Share your property type, rooms, requirements, budget range and timeline with Interior A to Z.

Discuss Your Project

Is Calling in a Professional Worth It? DIY vs. Pro Renovation Guide Read More »

What’s the Best Way to Finance Remodeling Projects? Smart Funding Tips

What’s the Best Way to Finance Remodeling Projects? | Interior A to Z
Home Renovation Finance Guide

What’s the Best Way to Finance Remodeling Projects?

Before choosing a loan or spending your savings, build the renovation budget first. Then match the funding method to the size, timing and certainty of the project.

Discuss Your Renovation Plan
Elegant modern home interior renovation
Start with the project, not the loan

Finance the scope you can clearly define

Remodeling becomes easier to finance when the scope is separated into essential work, functional upgrades and optional finishes. A clear brief helps you estimate the amount needed and reduces the chance of borrowing more than the project requires.

01 / SCOPE

Define what is changing

List rooms, civil work, kitchen, wardrobes, lighting, flooring, furniture and other deliverables before discussing funding.

02 / BUDGET

Build an itemized estimate

Separate materials, labour, design, execution and other project costs so you can compare proposals on the same basis.

03 / CASH FLOW

Map when money is needed

Match expected payments to your available cash and any financing schedule rather than treating the remodel as one single expense.

01 — Budget first

Know the full renovation number

A renovation budget should reflect the actual scope, not only the headline price of carpentry or construction. Include design, materials, labour, electrical and plumbing changes, flooring, furniture, delivery and applicable taxes or fees.

Keep a separate contingency for unexpected site conditions and agreed changes. The appropriate amount depends on the condition of the property and complexity of the work.

Modern living room renovation details
02 — Funding options

Compare the main ways to pay

MethodWhat it can suitWhat to checkPlanning point
Existing savingsProjects you can fund without creating new debt.Emergency reserve and remaining cash needs.Do not commit every available rupee to the remodel.
Home-related borrowingLarger projects where a lender offers a suitable renovation or home-loan facility.Rate, fees, security, eligibility and repayment terms.Understand the total cost over the full tenure.
Personal loanRenovation where flexible borrowing is available and appropriate.Interest rate, processing fees, tenure and total repayment.Shorter repayment can mean higher monthly outgo.
Staged paymentsProjects delivered in defined phases.Milestones, advance payments and change-order terms.Make sure the payment schedule follows real project progress.
03 — Reduce the amount you need

Control the budget before borrowing more

KEEP

Retain what still works

Good flooring, usable furniture, functional doors or suitable fittings may not need replacement. Confirm compatibility before deciding.

PRIORITIZE

Fund functional upgrades first

Layout, storage, electrical, plumbing, kitchen function and durable finishes can be separated from decorative extras.

PHASE

Split optional work

Where practical, schedule secondary rooms or decorative upgrades later instead of increasing the initial funding requirement.

Contemporary kitchen and home interior
04 — Avoid hidden costs

The renovation price is more than the visible finish

DIY work and incomplete planning can introduce costs that are easy to overlook: tools, material waste, delivery, rework, temporary accommodation, design changes and correcting work that does not meet the intended specification.

Ask every contractor or designer to explain what is included, excluded and provisional. An itemized quotation makes funding decisions more reliable.

05 — A practical decision framework

Match funding to the project type

01 Refresh Paint, décor or selected furniture.
02 Single room Kitchen, bedroom or living room.
03 Multi-room Several spaces with coordinated work.
04 Renovation Civil, electrical or plumbing changes.
05 Turnkey Design, materials and execution together.
06 — Before you sign

Questions to ask your designer or contractor

Funding is easier to manage when the project agreement is clear. Ask for a written scope, material specifications, payment milestones, change-order process and responsibilities for procurement and execution.

☑ Itemized scope and quotation
☑ Material brands/specifications
☑ Payment milestones
☑ Timeline and dependencies
☑ Change-order procedure
☑ Warranty or defect responsibility
☑ What is excluded
☑ Who coordinates execution
07 — Delhi NCR renovation planning

Build a finance-ready interior brief

For a 2 BHK, 3 BHK, 4 BHK, villa or larger home, start by documenting the property, approximate area, rooms, existing condition, preferred style, required storage, kitchen scope, furniture needs and target completion date. This gives the design and execution team a clearer basis for a quotation.

Get the renovation scope clear before deciding how to finance it.

Share your home type, approximate area, rooms to renovate and the work you are considering. A defined scope makes the next budgeting decision much easier.

Start a Consultation
FAQs

Remodeling finance questions

What is the best way to finance a remodeling project?

There is no single best method for every homeowner. Compare available savings, borrowing cost, repayment period, project scope and cash-flow requirements before choosing how to fund the work.

Can I pay for a remodel in stages?

Yes. A staged renovation can separate essential work from optional upgrades and align spending with project milestones, subject to the agreed payment schedule.

Should I use savings for home renovation?

Savings can reduce borrowing, but keep an appropriate emergency reserve and account for a realistic contingency before committing the full amount to renovation.

Can a personal loan be used for renovation?

Personal loans may be usable for renovation depending on the lender and borrower eligibility. Compare the interest rate, fees, tenure and total repayment before proceeding.

What should be included in a renovation budget?

Include design, materials, labour, demolition or civil work where applicable, electrical and plumbing changes, furniture or custom carpentry, delivery, taxes or fees where relevant, and a contingency.

How can I avoid renovation cost overruns?

Define the scope before work begins, compare itemized quotations, document materials and quantities, limit mid-project changes and keep a separate contingency.

What’s the Best Way to Finance Remodeling Projects? Smart Funding Tips Read More »

What Should You Never Do to Save Money on a Remodel? Safety First

What Should You Never Do to Save Money on a Remodel? | Interior A to Z
Smart Remodeling Budget Guide

What Should You Never Do to Save Money on a Remodel?

Cutting a renovation budget does not have to mean cutting corners. Protect safety, compliance and long-term performance first—then find savings in design, finishes and unnecessary complexity.

Plan Your Renovation
Premium home interior renovation
The key rule

Save on choices, not on safety

The most useful remodeling budget question is not simply “Where can I spend less?” It is “Which decisions are expensive to undo?” Safety-critical work, concealed services and required approvals deserve careful planning. Decorative elements are usually easier to simplify or postpone.

DO NOT CUT

Safety & compliance

Do not bypass required approvals or use unsafe shortcuts in structural, electrical, plumbing or other regulated work.

DO NOT CUT

Concealed construction

Waterproofing, wiring, plumbing and substrate preparation can be difficult to inspect after finishes are installed.

SAVE HERE

Decorative complexity

Simplify feature walls, decorative ceilings, accessories and excessive customization when they are not essential to the brief.

01 — Permits

Never skip a required building permit

Permit requirements vary by property, location and the type of work being carried out. If approval is required, treating it as an optional expense can create problems later.

The original Interior A to Z article specifically identifies skipping required permits as a poor way to reduce remodeling costs because non-compliant work can create fines and future property complications. citeturn0search0

Before starting structural or regulated work, confirm which permissions apply to your property with the relevant local authority or qualified professional.

Architectural renovation planning documents
02 — The expensive shortcuts

Five places where the cheapest option can become costly

01

Structural changes

Never remove, cut or alter structural elements simply to reduce labour or construction costs. Get the required technical assessment first.

02

Electrical work

Do not compromise on appropriate wiring, protection, load planning or qualified installation to reduce the initial quote.

03

Plumbing

Cheap fittings or poorly planned concealed plumbing can result in leaks, access problems and repeated repair work.

04

Waterproofing

Bathrooms, kitchens, balconies and other moisture-prone areas need the correct waterproofing system and proper application.

05

Substrate preparation

Paint, tiles, panels and finishes perform only as well as the surface beneath them. Skipping preparation can shorten their useful life.

06

Critical hardware

Do not reduce quality blindly on hinges, channels, locks, electrical protection or other components that affect daily operation and durability.

03 — Compare the whole quotation

The lowest quote is not always the lowest project cost

A lower headline price may reflect a smaller scope, cheaper materials, fewer included services or exclusions that appear later. Compare quotations line by line before making a decision.

CompareAskWhy it matters
MaterialsWhat board, laminate, hardware, paint, tile or fitting is specified?Different specifications can produce very different long-term performance.
QuantityAre measurements and quantities clearly stated?Missing quantities make quotes difficult to compare.
LabourIs installation included?A low material price can be offset by separate labour charges.
Electrical & plumbingAre points, fixtures and installation included?Hidden service costs can appear after work begins.
ExclusionsWhat is specifically not included?Exclusions are essential for understanding the real project budget.
ChangesHow are variations approved and priced?Uncontrolled changes can quickly increase the final cost.
Modern kitchen renovation with practical finishes
04 — Where you can save

Reduce cost without reducing the home’s fundamentals

Reuse suitable furniture
Refinish or reupholster pieces that still fit the new plan.
Use modular solutions
Standardized systems can reduce unnecessary custom manufacturing.
Simplify decorative work
Reduce elaborate wall treatments, ceilings and decorative layers.
Choose practical finishes
Select durable, easy-maintenance materials instead of paying only for appearance.
Design in phases
Complete essential areas first and add optional upgrades later.
05 — The five-stage cost-control method

Plan before you spend

01MeasureRecord dimensions, existing conditions and constraints.
02PrioritizeSeparate essential work from optional upgrades.
03SpecifyFinalize materials and scope before execution.
04CompareReview complete quotations, not headline prices.
05ControlApprove changes in writing and track the budget.
06 — Home interiors

Budget carefully across a 2 BHK, 3 BHK or 4 BHK remodel

The same principle applies whether you are updating one room or completing a full home interior. Plan the functional foundation first—layout, kitchen, storage, electrical, plumbing and durable finishes—then allocate the remaining budget to aesthetics and optional upgrades.

2 BHK

Prioritize high-use spaces

Kitchen, living room, wardrobes and essential lighting can form the core scope before secondary decorative upgrades.

3 BHK

Coordinate the whole palette

Use a consistent material strategy across rooms to reduce unnecessary one-off finishes and customization.

4 BHK+

Phase where practical

A larger home can be divided into logical execution phases when the project and contractor arrangement allow it.

07 — Professional planning

Use expertise where mistakes are expensive

Interior designers can help with space planning, material selection, measurements, drawings, budgeting and execution coordination. Interior A to Z’s related guidance also emphasizes avoiding incorrect furniture sizes, poor layouts, inadequate storage, wrong materials and rework. citeturn0search2

The right scope of professional involvement depends on the size and complexity of your project. For a simple refresh, you may need less support; for multi-trade renovation or turnkey execution, planning and coordination become more substantial.

Explore Interior Design Services
Interior designer planning a modern home

Save money by removing waste—not by removing safety.

Define the scope, compare complete quotations and spend carefully on the parts of the remodel that are difficult or expensive to correct later.

Discuss Your Interior Project
FAQs

Questions about saving money on remodeling

What should you never do to save money on a remodel?

Do not save money by bypassing required permits, compromising structural work, using unsafe electrical or plumbing practices, skipping waterproofing, or choosing materials that are unsuitable for their application.

Can skipping a building permit save money?

If a permit is required, skipping it can create compliance, safety, penalty and future-sale complications. Check the requirements that apply to your property and project before work begins.

Where can I safely save money during a renovation?

Potential savings can come from simplifying decorative details, reusing suitable furniture, choosing practical finishes, reducing unnecessary customization and completing the work in phases.

Should I choose the cheapest renovation quotation?

Compare the complete scope, materials, hardware, labour, exclusions, timeline and warranty terms rather than selecting a contractor solely on the lowest headline price.

Why is waterproofing a bad place to cut costs?

Poor waterproofing can lead to moisture damage, deterioration and expensive remedial work. The correct system should match the location and site conditions.

How can an interior designer help control remodeling costs?

A designer can help define scope, plan layouts, specify materials, coordinate drawings and reduce rework. The value depends on the project and the agreed scope of professional services.

What Should You Never Do to Save Money on a Remodel? Safety First Read More »

How Much Money Can You Save by Cutting Corners? Cost Reduction Guide

How Much Money Can You Save by Cutting Corners? | Interior A to Z
Smart Remodeling Budget Guide

How Much Money Can You Save by Cutting Corners?

Renovation savings can be real—but the biggest question is where to simplify. Learn how to reduce unnecessary spending without turning a small saving into a future repair bill.

Plan Your Interior Project
Modern home interior renovation with refined finishes
The smarter definition of cutting corners

Save by simplifying—not by weakening the project

The amount you can save depends on the original scope, material specifications, customization, labour and the number of rooms involved. There is no reliable universal percentage. Instead, divide your budget into decisions that are easy to change later and decisions that become expensive to correct once construction is complete.

AVOID

Safety-critical shortcuts

Do not reduce essential standards in structural, electrical, plumbing, waterproofing or other specialist work simply to lower the first quotation.

SAVE

Unnecessary customization

Standard dimensions, modular solutions and fewer one-off details can reduce manufacturing and installation complexity.

PHASE

Optional decoration

Artwork, accessories, elaborate wall treatments and some furniture upgrades can often be added after the core interior is functional.

01 — The savings hierarchy

Not every rupee saved has the same consequence

Think about renovation decisions by reversibility. A cushion, lamp or decorative wall can usually be changed later. Waterproofing, concealed wiring, plumbing routes and structural work are far harder to replace once the finished surface is closed.

Easy to change Décor, accessories, artwork, selected soft furnishings
Moderate to change Furniture, some lighting fixtures, selected surface finishes
Hard to change Built-ins, flooring, cabinetry and major wall treatments
Very costly to correct Structural work, concealed services, waterproofing and major layout changes
Contemporary residential interior with built-in storage
02 — Where the savings can come from

Six practical ways to lower the renovation budget

01

Reduce the scope

Renovate the rooms that need work first instead of automatically renovating the entire home.

02

Choose modular

Standardized kitchen, wardrobe and storage solutions can reduce unnecessary custom manufacturing.

03

Reuse what works

Retain suitable furniture, fittings or surfaces when their condition and new layout allow it.

04

Simplify civil work

Avoid unnecessary demolition, wall changes and complex rerouting when a simpler layout achieves the same function.

05

Mix material levels

Use durable, cost-conscious finishes in secondary areas while reserving premium materials for focal or high-use spaces.

06

Phase upgrades

Complete essential kitchen, storage, lighting and functional work first, then add optional décor as funds allow.

03 — A quotation is only useful if it is comparable

Do not confuse a lower quote with a lower total cost

A very low quotation may reflect missing scope, lower specifications, separate labour, exclusions or unrealistic assumptions. Compare the details before deciding how much you are actually saving.

ItemCheck before accepting a lower pricePotential issue
Materials Board, laminate, veneer, paint, tiles, stone and hardware specifications Two quotes may look similar while using different products.
Custom work Dimensions, internal fittings and finishing details Missing components may become additions later.
Electrical Number of points, fixtures, wiring and installation Basic quotations may exclude important electrical items.
Plumbing Fixtures, points, pipework and installation responsibilities Unclear service scope can create variations.
Civil work Demolition, masonry, plastering and disposal Excluded site work can materially change the final budget.
Execution Who coordinates vendors and installation Multiple vendors can create additional coordination costs.
Elegant living room interior with layered finishes
04 — Material substitutions

Choose alternatives by performance, not just price

Smart substitutions can reduce costs when the alternative is appropriate for the location and use. For example, a practical laminate may be suitable where a premium veneer is not essential, or a standard ceramic tile may meet the needs of a space where imported stone is primarily a visual preference.

Always compare durability, maintenance, moisture resistance, hardware quality, warranty and installation requirements before selecting a cheaper alternative.

05 — What not to sacrifice

Protect the expensive-to-correct parts of the home

Structural integrity

Do not remove or modify structural elements simply to reduce construction cost. Obtain appropriate technical guidance before structural changes.

Electrical safety

Budget reductions should not depend on unsuitable wiring, protection devices, load planning or unqualified installation.

Waterproofing

Bathrooms, kitchens, balconies and wet areas need an appropriate waterproofing system and proper preparation.

Plumbing

Poor concealed plumbing can create leaks and difficult repairs after finishes are installed.

Required approvals

If permits or approvals apply to your project, confirm them before construction instead of treating them as optional expenses.

Critical hardware

Do not automatically choose the cheapest hinges, channels, locks or components that affect frequent daily use.

06 — The five-step budget method

Find savings before construction begins

01 Define List rooms, functions and required work.
02 Prioritize Separate essential, important and optional items.
03 Specify Choose materials and quantities clearly.
04 Compare Review complete quotations and exclusions.
05 Phase Delay optional work instead of lowering essential quality.
07 — Delhi NCR homes

How this works for 2 BHK, 3 BHK and 4 BHK interiors

For a smaller apartment, savings may come from keeping the existing layout, selecting modular storage and avoiding unnecessary civil changes. For larger homes, phased execution and a consistent material palette can help prevent spending on low-priority spaces.

Modern open plan home interior in a neutral palette
08 — Professional cost control

Good planning can be a cost-saving tool

Professional design support can help clarify layouts, quantities, materials, drawings and execution responsibilities before work starts. The objective is not to add complexity—it is to reduce avoidable rework and make the available budget more deliberate.

Scope clarity
Know exactly what is included before signing.
Material planning
Select suitable alternatives before procurement rather than changing products mid-project.
Space planning
Avoid buying furniture or storage that does not work with the actual room dimensions.
Execution coordination
Reduce conflicts between carpentry, electrical, plumbing, painting and other trades.

The biggest renovation saving is often the cost you never create.

Reduce unnecessary scope, compare complete quotations and make expensive-to-correct work the last place you try to save.

Discuss Your Home Interior
FAQs

Questions about cutting renovation costs

How much money can you save by cutting corners on a remodel?

There is no universal percentage because savings depend on the project scope, materials, labour and what is being simplified. The safer approach is to reduce unnecessary scope, customization and decorative complexity rather than compromising essential construction quality.

Where can I cut costs during a home renovation?

Potential savings can come from reusing suitable furniture, choosing standard or modular solutions, simplifying decorative features, reducing unnecessary civil work and phasing optional upgrades.

Should I use cheaper materials to save money?

Sometimes a suitable alternative material can reduce cost, but it should meet the performance requirements of its application. Compare specifications, durability, maintenance and installation requirements rather than price alone.

Is it cheaper to reduce the renovation scope?

Reducing the scope can lower the initial project cost because fewer rooms, finishes, custom elements or construction tasks are required. Plan the complete design first if future phases are likely.

Can I save money by doing some renovation work myself?

Some low-risk decorative tasks may be suitable for DIY, but electrical, structural, plumbing, waterproofing and other specialist work should be handled according to applicable safety and professional requirements.

How do I compare low-cost renovation quotations?

Compare the complete scope, quantities, material specifications, hardware, labour, exclusions, payment schedule, timeline and warranty terms rather than comparing only the final price.

How Much Money Can You Save by Cutting Corners? Cost Reduction Guide Read More »

Where Can You Cut Corners During Remodeling? Strategic Saving Tips

Where Can You Cut Corners During Remodeling? | Interior A to Z
Strategic Remodeling Savings

Where Can You Cut Corners During Remodeling?

You can reduce a renovation budget without reducing the quality of the entire home. The key is knowing which decisions are flexible and which become expensive to fix later.

Plan Your Interior Project
Modern home interior with refined renovation finishes
The basic rule

Cut scope before you cut quality

The original Interior A to Z guide makes the same central distinction: homeowners can make strategic savings, but should not compromise safety or permits. It highlights material substitutions, reducing project scope and prioritizing functionality as practical ways to manage costs.

SAVE

Decorative complexity

Simplify feature walls, decorative ceilings, accessories and other visual layers that are not essential to the home’s function.

SAVE

Unnecessary customization

Use standard dimensions, modular products and repeatable details where they provide the same practical result.

PROTECT

Safety & concealed work

Do not make savings depend on structural, electrical, plumbing, waterproofing or required compliance work.

01 — Reduce the scope

The easiest saving is work you do not have to buy

Instead of specifying premium finishes everywhere, decide which spaces and features actually need the investment. A 3 BHK renovation, for example, does not necessarily need every room to receive the same level of customization.

You can prioritize the kitchen, wardrobes, lighting and high-use living spaces, then postpone selected decorative upgrades or secondary rooms if the budget requires it.

Keep
Essential functional improvements and difficult-to-correct work.
Simplify
Decorative details, excessive customization and unnecessary visual layers.
Phase
Optional rooms, accessories and upgrades that can be completed later.
Modern living room renovation with practical furniture
02 — Six places to save

Where a lower-cost decision can make sense

01

Standard doors

Where the design permits, a standard interior door specification can reduce cost compared with more elaborate custom door construction.

02

Kitchen countertops

A practical countertop can be selected now and upgraded later when the underlying kitchen design allows the replacement.

03

Floor finishes

A suitable ceramic or other practical flooring option can sometimes replace a higher-cost imported or natural-stone finish.

04

Living room décor

Artwork, accessories and some decorative furniture can be added gradually without holding up the essential renovation.

05

Custom details

Reduce one-off profiles, elaborate paneling and highly customized elements when a simpler detail achieves the same function.

06

Secondary spaces

Guest rooms, utility areas or lower-priority zones can sometimes be completed in a later phase if the overall design is planned from the beginning.

03 — Smart substitutions

Choose the right material, not automatically the most expensive one

A cheaper material is only a useful saving when it is appropriate for the location, use and expected level of wear. Compare performance before comparing price.

AreaPossible saving strategyCheck before choosing
Kitchen Use a practical countertop or standard finish where premium stone is not essential. Heat, moisture, maintenance, edge details and installation.
Flooring Use a suitable ceramic or other cost-conscious finish instead of a premium natural stone. Slip resistance, maintenance, thickness and room use.
Wardrobes Use standardized internal layouts and avoid unnecessary specialty fittings. Hardware quality, load, daily use and storage requirements.
Walls Use paint or a simple finish instead of covering every wall with decorative panels. Surface condition, maintenance and desired visual effect.
Furniture Reuse suitable pieces or choose standard furniture for secondary spaces. Dimensions, comfort, condition and compatibility with the new layout.
Elegant residential interior with layered materials
04 — Function first

Spend more carefully on what you use every day

A useful way to allocate a remodeling budget is to rank decisions by frequency of use, difficulty of replacement and consequences of failure.

HIGH PRIORITY Kitchen & storage Daily use, hardware, workflow and capacity.
HIGH PRIORITY Electrical & plumbing Concealed services and technical performance.
FLEXIBLE Décor & accessories Easy to change when the budget permits.
05 — Do not cut these corners

Some savings can become expensive later

Required permits

If your project requires approvals, confirm them before construction. Avoiding required permits can create compliance and future property complications.

Structural work

Never reduce cost by making unqualified structural changes or removing elements without appropriate technical assessment.

Electrical safety

Do not compromise appropriate wiring, protection, load planning or qualified installation simply to reduce the quotation.

Plumbing

Poor concealed plumbing can result in leaks and difficult repairs once walls, floors or cabinetry are finished.

Waterproofing

Bathrooms, kitchens, balconies and wet areas need suitable waterproofing and proper preparation.

Critical hardware

Avoid automatically choosing the cheapest hinges, channels, locks or other components that receive heavy daily use.

06 — Compare quotations correctly

Do not compare only the final number

Two remodeling quotations can have very different scopes while showing similar or very different headline prices. Compare what you are actually buying.

CompareQuestionWhy it matters
Materials Are the brands, grades and specifications listed? Lower prices can reflect lower specifications.
Quantities Are measurements and quantities clear? Unclear quantities make the quotes difficult to compare.
Labour Is installation included? Separate labour can change the real project cost.
Services Are electrical, plumbing and civil works included? Excluded technical work may become an additional expense.
Exclusions What is specifically not included? Exclusions often explain why one quote is lower.
Changes How are variations priced? Uncontrolled changes can quickly increase the final amount.
07 — Five-step savings plan

Find the savings before work starts

01 Define List the rooms and functions that actually need renovation.
02 Prioritize Separate essential work from optional upgrades.
03 Specify Finalize materials, quantities and hardware.
04 Compare Review complete quotations and exclusions.
05 Phase Postpone flexible upgrades instead of reducing essential quality.
08 — Delhi NCR homes

Apply the strategy to 2 BHK, 3 BHK and 4 BHK interiors

For compact apartments, keeping the existing layout and using modular storage can reduce unnecessary construction. For larger homes, a consistent material palette and phased work can help control customization and reduce spending on lower-priority spaces.

Interior A to Z’s broader service guidance describes a process built around consultation, space planning, design, material selection, planning and execution, which can help establish the scope before work begins.

Explore Home Interior Design
Modern apartment interior with practical storage
09 — Professional guidance

A clear design plan can itself be a cost-saving tool

Professional design support can help identify where customization is necessary, where standard solutions are enough and where changing the layout could reduce material or execution complexity. A structured design process can also help with budget-conscious material selection, visualization and project coordination.

Space planning
Reduce wasted space and avoid buying furniture that does not fit.
Material selection
Choose alternatives based on use, durability and maintenance.
3D visualization
Review the intended design before committing to construction and finishes.
Execution coordination
Reduce avoidable conflicts between carpentry, electrical, plumbing and finishing trades.

The smartest remodeling saving is a simpler project—not a weaker one.

Reduce unnecessary work, compare complete quotations and protect the parts of the renovation that are difficult or expensive to correct later.

Discuss Your Interior Project
FAQs

Questions about cutting remodeling costs

Where can you cut corners during remodeling?

Potential savings usually come from reducing unnecessary scope, simplifying decorative features, using standard or modular solutions, reusing suitable items and phasing optional upgrades. Safety-critical and concealed work should be treated differently.

Can I save money by choosing cheaper interior materials?

A lower-cost material can work when it meets the performance requirements of the space. Compare durability, moisture resistance, maintenance, warranty and installation requirements rather than price alone.

Is reducing the remodeling scope better than using cheaper materials?

Reducing unnecessary scope can be a useful way to lower the budget because it removes work rather than lowering the quality of essential work. Future phases can be planned where appropriate.

Where should I not cut costs during a remodel?

Avoid cost reductions that compromise required permits, structural integrity, electrical safety, plumbing, waterproofing or other specialist work that is difficult or expensive to correct later.

How can I compare two remodeling quotations?

Compare scope, quantities, material specifications, hardware, labour, electrical and plumbing provisions, exclusions, payment milestones, timeline and warranty terms—not only the final price.

Can an interior designer help reduce remodeling costs?

A designer can help prioritize scope, plan layouts, select suitable materials, coordinate drawings and reduce rework. The appropriate level of professional involvement depends on the project’s size and complexity.

Where Can You Cut Corners During Remodeling? Strategic Saving Tips Read More »
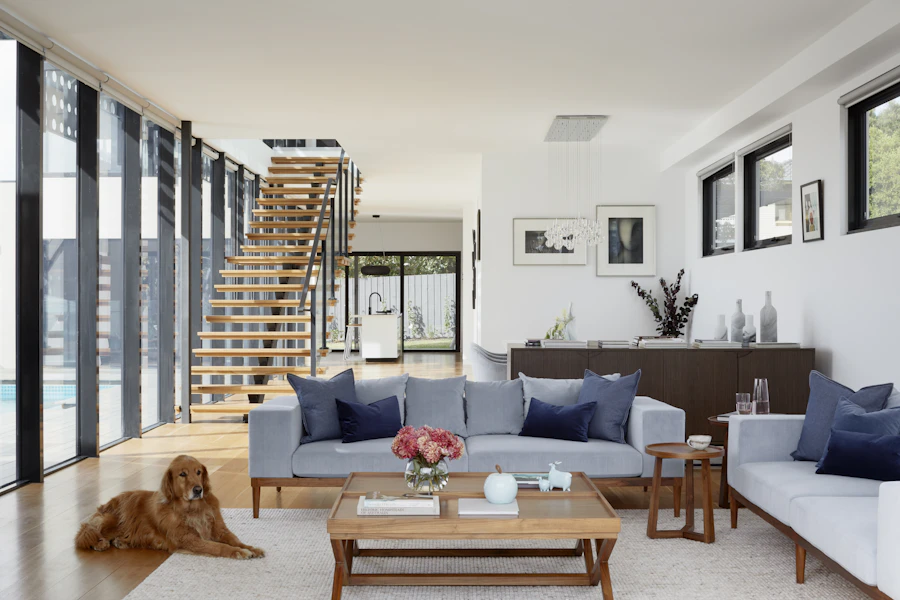
What’s the Best Way to Save Money on Remodeling? Budgeting Tips

The best way to save money on remodeling is to plan carefully, protect the existing structure where possible, and spend your budget on improvements that add lasting function and value. Cutting the price of every material is not always the best strategy; low-quality products, poor workmanship, and rushed decisions can lead to repairs and replacement costs later.

What Is the Best Way to Save Money on Remodeling?

Start with a clear scope, a realistic budget, and a priority list. Decide which work is essential, which upgrades would provide the greatest benefit, and which items can be postponed. Get detailed estimates before work begins and keep a contingency for unexpected conditions.

1. Define the Remodeling Scope Before You Start

Write down the rooms, construction work, finishes, fixtures, furniture, and services included in the project. A clear scope reduces last-minute changes, duplicate purchases, and disagreements with contractors. Separate must-have improvements from optional features so the project can be adjusted without losing its main purpose.

2. Set a Realistic Budget

Include design fees, materials, labour, permits where applicable, delivery, installation, waste removal, temporary accommodation if needed, and taxes. Keep a contingency fund for hidden damage, price changes, repairs, and approved variations. Avoid using the entire budget on finishes before allowing for essential construction and installation costs.

3. Keep the Existing Layout When Practical

Moving walls, plumbing, electrical points, doors, and windows can increase labour, material, approval, and finishing costs. If the existing layout is functional, consider improving storage, lighting, paint, furniture, and finishes instead of making major structural changes.

4. Prioritize High-Impact Improvements

Spend first on changes that improve safety, function, comfort, durability, or everyday use. Examples may include better storage, a well-planned kitchen, improved lighting, efficient fixtures, durable flooring, ventilation, or repairs to water and electrical systems. Decorative upgrades can be completed in phases if the budget is limited.

5. Compare Materials by Value, Not Only Price

Request options at different price points and compare durability, maintenance, warranties, availability, lead time, installation requirements, and appearance. The cheapest material may cost more over time if it fails quickly or requires specialist installation. Choose reliable mid-range products where premium materials do not provide a meaningful functional benefit.

6. Reuse and Refurbish Suitable Items

Existing furniture, doors, cabinets, lighting, and fittings may be reusable after repair, repainting, reupholstery, or hardware replacement. Reusing suitable items can reduce purchasing and disposal costs while allowing more budget for important new work.

7. Use Standard Sizes Where Possible

Standard cabinets, tiles, doors, furniture, and fittings are often easier to source and install than fully custom alternatives. Custom work may still be worthwhile for difficult layouts or important storage needs, but use it selectively and confirm measurements before ordering.

8. Plan Purchases and Delivery Carefully

Coordinate product orders with the construction schedule to avoid storage charges, damage, delays, and repeated delivery fees. Confirm quantities, dimensions, colours, finishes, and specifications before placing orders. Keep records of invoices, warranties, delivery dates, and approved substitutions.

9. Avoid Costly DIY Mistakes

DIY can be suitable for painting, styling, simple assembly, and other low-risk tasks when you have the necessary skills and time. Electrical, plumbing, structural, waterproofing, gas, and specialist work should be handled by appropriately qualified professionals. Incorrect work can create safety risks and expensive rework.

10. Hire Professional Help at the Right Stage

A designer, consultant, or experienced contractor can help with measurements, layout, material selection, drawings, budgeting, and coordination. Professional advice may prevent unsuitable purchases and costly changes. If full-service design is outside your budget, consider a limited consultation or design package for the most complex parts of the remodel.

11. Get Detailed Quotes and Compare the Scope

Request written quotes that separate labour, materials, design, installation, transport, taxes, exclusions, and payment stages. Compare what each quote includes rather than choosing only the lowest total. Ask how variations, delays, defective work, and additional materials will be handled.

12. Make Decisions Early

Late changes can affect drawings, purchases, labour, delivery schedules, and completed finishes. Finalize the layout and major specifications before construction begins, and document all changes in writing. Early decisions make it easier to compare prices and avoid rush charges.

13. Remodel in Phases When Necessary

Phasing can make a large project easier to manage financially. Complete essential repairs and infrastructure first, then schedule cabinetry, furniture, decorative finishes, or additional rooms as funds become available. Make sure each phase is planned so later work does not require unnecessary demolition or duplication.

Remodeling Cost-Saving Checklist

  • Define the exact scope and priorities
  • Prepare a complete budget with a contingency
  • Keep the existing layout when it works well
  • Repair or reuse suitable items
  • Compare materials based on total value and lifespan
  • Choose standard sizes where practical
  • Obtain detailed written quotes
  • Approve measurements and specifications before ordering
  • Use qualified professionals for specialist work
  • Record all changes, costs, warranties, and payments

Final Thoughts

The most effective remodeling savings come from planning, prioritizing, comparing total value, and avoiding rework. Do not reduce costs by compromising safety, waterproofing, structural quality, electrical work, or essential installation standards. A carefully managed scope and a realistic budget can help you create a better space without spending more than necessary.

What’s the Best Way to Save Money on Remodeling? Budgeting Tips Read More »

Ask The Contractor: Smart Ways to Save Money on Your Remodeling Projects

Before hiring a contractor for a remodeling project, ask detailed questions about the scope, budget, materials, schedule, workmanship, insurance, and payment terms. Clear answers help you compare proposals, prevent unexpected costs, and protect the quality of the finished space.

What Should You Ask a Contractor Before Remodeling?

Ask the contractor to explain exactly what is included, what is excluded, how the price was calculated, who will perform the work, and how changes will be approved. A professional quote should be detailed enough for you to understand the expected cost, timeline, responsibilities, and potential risks.

Questions About Experience and Credentials

  • How long have you worked on projects of this type and size?
  • Can you provide recent references or examples of comparable work?
  • Which parts of the project will you complete directly, and which will be subcontracted?
  • Are the required licences, registrations, insurance, and permits in place?
  • Who will supervise the work and communicate progress?
  • How do you manage safety, site protection, dust, noise, and waste?

Questions About the Scope of Work

  • Which rooms, tasks, materials, fixtures, and finishes are included?
  • What work is specifically excluded from the quote?
  • Does the price include demolition, disposal, delivery, installation, cleanup, and final testing?
  • Are design drawings, measurements, approvals, and inspections included where applicable?
  • What assumptions were used to prepare the estimate?
  • How will hidden damage or unexpected site conditions be handled?

Questions About the Remodeling Budget

Request an itemized estimate that separates labour, materials, subcontractors, equipment, delivery, taxes, permits, and other charges. Ask whether the price is fixed, an allowance, or an estimate, and clarify which costs can change.

  • What is the total contract price and what does it cover?
  • Which items are allowances, and what happens if the final selection costs more or less?
  • How are additional work and change orders priced?
  • Are there potential costs that are not included in the current estimate?
  • What contingency should be kept for unknown conditions?
  • When and how will invoices be issued?

Questions About Materials and Purchasing

  • Who selects, orders, receives, stores, and checks the materials?
  • Can you recommend alternatives with comparable performance at different price points?
  • Are delivery, storage, installation, and disposal included?
  • How will damaged, defective, late, or discontinued products be handled?
  • Who owns unused materials and receives product warranties?
  • Are contractor markups or procurement fees applied to purchases?

Questions About the Project Schedule

  • When can the work start, and what is the expected completion date?
  • What are the main project stages and decision deadlines?
  • Which materials or approvals could affect the schedule?
  • How will delays caused by weather, suppliers, inspections, or changes be handled?
  • How often will progress updates be provided?
  • What areas of the home will be unavailable during each stage?

Questions About Workmanship and Quality Control

  • What installation standards and product specifications will be followed?
  • How will measurements and levels be checked before installation?
  • Who approves work before it is covered or finished?
  • How will waterproofing, electrical, plumbing, ventilation, and structural work be inspected?
  • What testing, certificates, warranties, and completion documents will be provided?
  • How will defects or incomplete work be corrected?

Questions About Payments and the Contract

  • What deposit is required, and is it tied to a specific stage?
  • What milestones trigger progress payments?
  • Will you receive receipts or records for materials and subcontractor charges?
  • What is the process for approving variations in writing?
  • What happens if either party needs to pause or end the contract?
  • Is there a defects-liability or warranty period after completion?

How to Compare Contractor Quotes

  1. Give each contractor the same drawings, measurements, scope, and specifications.
  2. Compare labour, materials, allowances, exclusions, taxes, delivery, and installation separately.
  3. Check whether the proposed timeline is realistic and properly resourced.
  4. Ask for clarification in writing instead of relying on verbal promises.
  5. Review references, insurance, contract terms, payment stages, and warranty coverage.
  6. Do not choose solely on the lowest price; consider communication, detail, experience, and total value.

Warning Signs to Watch For

  • A quote with little detail or many unexplained allowances
  • Pressure to pay a large amount before work begins
  • Requests for cash payments without records
  • Reluctance to provide references, insurance, or a written contract
  • Unclear responsibility for permits, materials, or subcontractors
  • Promises that sound unrealistic or frequent unexplained price changes
  • Unwillingness to document variations and approvals

Final Thoughts

The right questions can reveal whether a contractor understands your project and has a reliable process for controlling cost and quality. Get the scope, price, schedule, materials, payment plan, change-order process, and warranty terms in writing before work begins. Careful comparison at the start can prevent expensive disputes and rework later.

For related planning guidance, review ways to save money on remodeling and learn more about factors that affect interior designer costs.

Ask The Contractor: Smart Ways to Save Money on Your Remodeling Projects Read More »

What are the Pros and Cons of Home Improvement Programs? A Homeowner’s Guide

Home improvement programs can help homeowners pay for repairs, energy upgrades, accessibility improvements, and renovations. They may offer grants, rebates, tax benefits, subsidized services, or low-interest financing, but each program has its own eligibility rules, approved work, deadlines, documentation, and repayment conditions.

What Are Home Improvement Programs?

Home improvement programs are initiatives offered by governments, local authorities, utilities, lenders, insurers, or nonprofit organisations. Depending on the provider, support may be available for essential repairs, energy efficiency, safety, accessibility, weatherproofing, or selected upgrades. Some programs support homeowners directly, while others require approved contractors or inspections.

Pros of Home Improvement Programs

1. Lower Upfront Costs

Grants, rebates, discounts, and low-interest loans can reduce the amount you need to pay at the beginning of a project. This may make essential repairs or efficiency improvements more affordable.

2. Support for Essential Repairs

Some programs focus on work that protects health, safety, structural integrity, accessibility, or basic living conditions. This can help homeowners address urgent problems before they become more expensive.

3. Improved Energy Efficiency

Programs may support insulation, efficient heating or cooling systems, windows, lighting, water-saving fixtures, or other upgrades that can reduce energy use. Actual savings depend on the property, installation quality, usage, and local energy prices.

4. Better Accessibility and Comfort

Eligible improvements may include ramps, handrails, safer bathrooms, improved entrances, and other modifications that make a home easier to use for people with disabilities, older adults, or changing household needs.

5. Potential Property and Resale Benefits

Well-executed repairs and improvements may make a home more comfortable, durable, attractive, or marketable. However, a program does not guarantee a particular increase in property value.

6. Encouragement to Use Qualified Professionals

Some programs require inspections, permits, approved materials, or registered contractors. These requirements can improve accountability and help reduce the risk of unsafe or poor-quality work.

Cons of Home Improvement Programs

1. Strict Eligibility Requirements

Programs may limit support by income, location, property type, ownership status, age, disability, energy performance, or the purpose of the work. Applying does not guarantee approval.

2. Limited Approved Work

A program may fund safety, energy, or accessibility improvements but exclude decorative changes, luxury finishes, furniture, landscaping, or unrelated structural work. A kitchen upgrade, for example, may qualify only when it meets the program’s specific conditions.

3. Application and Approval Delays

Applications may require quotes, proof of ownership, income documents, property assessments, plans, inspections, receipts, and completion reports. Processing and approval can delay the remodeling schedule.

4. Upfront Payment or Reimbursement Rules

Some programs require the homeowner to pay first and claim a rebate later. Others release funds only after milestones or final inspections. Confirm the cash-flow requirements before signing a contract or ordering materials.

5. Additional Costs May Remain

Funding may cover only part of the approved work. You may still need to pay for deductibles, upgrades, permits, professional fees, taxes, delivery, preparation, repairs, or work needed to bring the property up to code.

6. Restrictions on Contractors and Materials

Approved contractors, product lists, performance standards, or installation methods may be mandatory. This can reduce your choice of suppliers and may affect availability, design options, or project timing.

7. Repayment and Compliance Conditions

Loans must be repaid, and some grants or deferred-payment programs may have conditions related to occupancy, resale, refinancing, or the length of time you keep the property. Read the agreement carefully and ask what happens if your circumstances change.

Questions to Ask Before Applying

  • Who operates the program, and is the information current?
  • What types of properties and homeowners qualify?
  • Which repairs, upgrades, materials, and services are approved?
  • Is the support a grant, rebate, tax benefit, loan, or deferred payment?
  • Do I need approval before starting work?
  • Must I use an approved contractor or supplier?
  • Do I pay upfront, and when are funds released?
  • What documents, inspections, permits, and receipts are required?
  • What costs are excluded?
  • Could the support affect taxes, insurance, benefits, resale, or refinancing?
  • What happens if the work costs more than the approved amount?
  • What are the cancellation, repayment, and dispute rules?

How to Evaluate a Program

  1. Confirm the provider and check that the program is currently open.
  2. Read the official eligibility rules and approved-work list.
  3. Obtain detailed quotes for the complete project, not only the funded portion.
  4. Calculate your contribution, financing cost, taxes, professional fees, and contingency.
  5. Compare the expected benefit with the total cost and any long-term obligations.
  6. Get approval and document requirements in writing before work begins.
  7. Keep contracts, invoices, receipts, inspection reports, warranties, and photographs.

When a Home Improvement Program May Be a Good Choice

A program may be useful when the supported work addresses an urgent repair, improves safety or accessibility, reduces energy use, or would otherwise be difficult to fund. It may be less suitable when you need a fast completion date, want unrestricted design choices, or the required private contribution is too high.

Final Thoughts

The main advantages of home improvement programs are potential financial support, access to targeted repairs, and encouragement to complete efficiency or safety upgrades. The main disadvantages are eligibility restrictions, paperwork, delays, limited choices, cash-flow requirements, and possible repayment obligations. Compare the full project cost and conditions—not just the advertised benefit—before deciding.

What are the Pros and Cons of Home Improvement Programs? A Homeowner’s Guide Read More »

Who Pays for Home Improvement Incentive Programs and Why? Funding Guide

Home improvement incentive programs are usually funded by a combination of public budgets, utility charges, financial institutions, insurers, manufacturers, and nonprofit or community organisations. The funding source depends on the program’s purpose, location, eligibility rules, and whether the support is a grant, rebate, tax benefit, subsidized service, or loan.

Who Pays for Home Improvement Incentives?

1. National, State, and Local Governments

Government agencies may use tax revenue, public budgets, housing funds, or dedicated infrastructure programs to finance grants, rebates, tax benefits, and low-interest loans. Local authorities may target repairs, accessibility, energy efficiency, disaster recovery, or neighbourhood improvement.

2. Utility Companies and Energy Programs

Energy providers may fund rebates or discounts for insulation, efficient heating and cooling, windows, appliances, lighting, water-saving fixtures, and other upgrades. These programs are often designed to reduce demand, improve efficiency, and support long-term system planning. Check whether the incentive is funded directly by the provider or through a regulated energy-efficiency charge.

3. Banks and Other Lenders

Financial institutions may offer promotional rates, renovation loans, or financing linked to energy or property improvements. A lender may receive public support, a guarantee, or a risk-sharing arrangement that helps reduce the cost of borrowing. A loan is not free money: review the interest rate, fees, term, security, and total repayment amount.

4. Insurance Companies

Insurers may encourage improvements that reduce the likelihood or severity of claims, such as stronger roofing, leak prevention, fire protection, security systems, or storm preparation. The benefit may appear as a rebate, approved upgrade, or possible premium adjustment, but coverage and savings vary by insurer and policy.

5. Manufacturers, Retailers, and Contractors

Businesses may offer rebates, discounts, bundled pricing, trade-in programs, or installation incentives to promote specific products or services. Confirm whether the discount is applied immediately, paid after a claim, limited to selected models, or dependent on an approved installer.

6. Nonprofit and Community Organisations

Nonprofits, housing associations, and community groups may provide targeted assistance for essential repairs, accessibility, weatherization, or vulnerable households. Funding may come from donations, grants, community funds, or partnerships with public agencies.

Why Do Organisations Fund These Programs?

Energy and Environmental Goals

Efficiency incentives can reduce energy consumption, peak demand, emissions, and pressure on infrastructure. They may also make high-efficiency upgrades more affordable for households that would otherwise delay them.

Health, Safety, and Accessibility

Repair programs can help address unsafe conditions, improve indoor comfort, support independent living, and reduce risks related to fire, water damage, poor ventilation, or inadequate access.

Housing Quality and Community Development

Well-maintained homes can support neighbourhood stability, reduce deterioration, and improve the quality and resilience of local housing. Some programs are designed to preserve affordable homes or assist areas affected by disasters.

Economic Activity and Employment

Renovation incentives can encourage spending on local contractors, suppliers, manufacturers, and skilled workers. This may support employment and economic activity while improving homes.

Lower Long-Term Costs

Preventive repairs and efficient equipment may reduce future maintenance, energy, insurance, or emergency-response costs. The actual savings depend on the property, product, installation, usage, and program terms.

Are Home Improvement Incentives Really Free?

Not always. Grants and rebates may reduce your cost, but public programs are generally supported by taxes, budgets, or regulated charges. Utility incentives may be funded through customer contributions. Loans must be repaid with interest and fees. Manufacturer or retailer discounts may be reflected in product pricing or tied to a purchase. Read the conditions instead of relying on the advertised headline benefit.

What Homeowners Should Check Before Applying

  • Who operates and funds the program?
  • Is the program currently open, and are funds limited?
  • Who qualifies based on location, income, ownership, property type, or improvement type?
  • Is the support a grant, rebate, discount, tax benefit, subsidized service, or loan?
  • Must you apply and receive approval before starting work?
  • Are approved contractors, products, ratings, or permits required?
  • Do you pay upfront, and when is reimbursement or funding released?
  • Which costs, taxes, professional fees, and preparation work are excluded?
  • Could the incentive affect insurance, taxes, benefits, resale, or refinancing?
  • What documents, inspections, receipts, warranties, and completion reports are required?
  • What happens if the project costs more than the approved amount?
  • Are there repayment, occupancy, maintenance, or clawback conditions?

How to Compare the Real Value

  1. Calculate the full project price before the incentive.
  2. Subtract only the benefit you are genuinely eligible to receive.
  3. Add financing costs, taxes, fees, required upgrades, and your contingency.
  4. Compare the remaining cost with alternative products, contractors, and funding options.
  5. Consider energy, maintenance, comfort, safety, and durability benefits over time.
  6. Keep the official offer, contract, receipts, approvals, and warranty records.

Final Thoughts

Home improvement incentives are funded because organisations expect wider benefits, such as better housing quality, lower energy demand, safer homes, stronger communities, or increased economic activity. The funding may come from government budgets, utility customers, lenders, insurers, businesses, or nonprofit partners. Before committing to a project, verify who pays, what the incentive covers, how it is claimed, and what obligations remain with you.

Who Pays for Home Improvement Incentive Programs and Why? Funding Guide Read More »

What is a Home Improvement Program? Benefits and Financial Support Guide

A home improvement program is an initiative that helps eligible homeowners pay for, plan, or complete repairs and upgrades. Programs may provide grants, rebates, tax benefits, low-interest loans, subsidized services, technical guidance, or approved contractor support. The exact benefits and rules depend on the organization offering the program and the homeowner’s location, income, property, and project type.

What Does a Home Improvement Program Cover?

Programs may support work that improves a home’s safety, health, accessibility, energy performance, durability, or resilience. Eligible projects can include essential repairs, insulation, heating and cooling upgrades, windows, electrical or plumbing improvements, weatherproofing, ramps, safer bathrooms, and repairs after qualifying events. Decorative renovations and luxury finishes may be excluded.

Who Offers These Programs?

  • National, state, provincial, or local government agencies
  • Housing authorities and community development organizations
  • Utility companies and energy-efficiency providers
  • Nonprofit organizations and housing associations
  • Banks, lenders, insurers, manufacturers, and retailers

Some programs are available directly to homeowners, while others operate through approved contractors, suppliers, lenders, or local partners.

Types of Home Improvement Support

Grants

A grant may cover all or part of an approved improvement without requiring repayment, provided you meet the conditions. Grants often have limited budgets, strict eligibility rules, and documentation requirements.

Rebates and Discounts

A rebate usually returns part of an eligible cost after purchase, installation, inspection, or submission of required documents. Confirm whether approval is required before work begins and whether funds are limited.

Tax Benefits

Some improvements may qualify for a tax credit, deduction, exemption, or other tax treatment. Eligibility and value depend on current rules and your personal tax situation, so confirm the details with the relevant authority or a qualified tax professional.

Loans and Deferred-Payment Financing

Low-interest loans, guaranteed loans, and deferred-payment options can spread the cost of a project. They are still financial obligations, so review interest, fees, security, repayment dates, occupancy conditions, and what happens if you sell or refinance the property.

Technical and Contractor Support

A program may provide energy assessments, design guidance, inspections, approved product lists, or access to registered contractors. These requirements can improve quality but may limit your choice of professionals and materials.

How Do Home Improvement Programs Work?

  1. Check the program provider, location, opening date, funding availability, and eligibility requirements.
  2. Confirm which work, products, contractors, permits, and property types qualify.
  3. Prepare documents such as proof of ownership, income records, plans, quotes, photos, or assessments.
  4. Apply and receive written approval before purchasing materials or starting work when required.
  5. Complete the work according to the program’s standards and inspection requirements.
  6. Submit invoices, receipts, certificates, photographs, and completion reports.
  7. Receive the grant, rebate, credit, loan funds, or other approved support according to the payment schedule.

Who Can Qualify?

Eligibility may depend on location, household income, ownership or tenancy, property type, age, disability, energy performance, disaster impact, and the proposed improvement. Meeting one requirement does not guarantee approval, and some programs may prioritize specific households or neighborhoods.

What Costs May Not Be Covered?

  • Decorative upgrades, luxury finishes, furniture, and unrelated improvements
  • Work started before written approval
  • Permits, design fees, taxes, delivery, preparation, or code-compliance work
  • Costs above the approved allowance or program maximum
  • Repairs caused by poor installation or non-approved materials

Request a complete project quote so you understand the amount you must pay yourself, including any contingency for unexpected conditions.

Benefits of Using a Home Improvement Program

  • Lower upfront or total project costs
  • Access to repairs that may otherwise be delayed
  • Improved safety, comfort, accessibility, and energy performance
  • Possible reductions in long-term maintenance or utility costs
  • More accountability through inspections, standards, or approved contractors

Potential Drawbacks

  • Strict eligibility rules and limited funding
  • Application paperwork and approval delays
  • Restrictions on contractors, products, design choices, or project scope
  • Upfront payment requirements before reimbursement
  • Repayment, occupancy, resale, maintenance, or compliance conditions

Questions to Ask Before Applying

  • Who operates and funds the program, and is the information current?
  • Is the support a grant, rebate, tax benefit, discount, subsidized service, or loan?
  • Do I need approval before beginning work?
  • Which costs and improvements are excluded?
  • Must I use an approved contractor, product, or installation method?
  • How much must I pay upfront, and when are funds released?
  • What inspections, permits, receipts, and completion documents are required?
  • Could the support affect taxes, insurance, benefits, resale, or refinancing?
  • What happens if the project costs more than the approved amount?

How to Decide Whether It Is Right for You

  1. Calculate the full project cost, including excluded work, fees, taxes, and contingency.
  2. Confirm the benefit you are actually eligible to receive rather than relying on an advertised maximum.
  3. Compare the remaining cost with other contractors, products, financing options, and timelines.
  4. Read the agreement, payment schedule, warranty terms, and repayment conditions.
  5. Keep all approvals, contracts, receipts, inspection reports, photographs, and warranties.

Final Thoughts

A home improvement program can make essential repairs and targeted upgrades more affordable, but it is not a universal source of free renovation money. The most important steps are confirming eligibility, understanding what is covered, securing approval before work begins, and calculating your complete out-of-pocket cost. Compare the long-term benefits and obligations before committing to a project.

What is a Home Improvement Program? Benefits and Financial Support Guide Read More »

Ask The Contractor: Things To Know About Home Improvement Incentive Programs & Funding

Home Improvement Incentive Programs: What to Ask the Contractor | Interior A to Z
Contractor & Renovation Planning Guide

Home Improvement Incentive Programs: What Should You Ask the Contractor?

Before you count a rebate, grant, discount or financing benefit as part of your renovation budget, confirm the rules, eligible work, paperwork and payment process with the contractor.

Plan Your Interior Project
Home renovation planning and contractor documents
Start here

Do not treat an incentive as guaranteed project money

Home improvement incentives can take different forms: grants, rebates, discounts, tax benefits, subsidized services or loans. Eligibility, timing, approved products and contractor requirements can vary by program and location. Check who operates the program, whether funds are available, what qualifies and whether approval is required before work begins.

01 / ELIGIBILITY

Does my project qualify?

Confirm the property, homeowner, improvement type and other eligibility conditions before changing the scope around an expected benefit.

02 / TIMING

When must I apply?

Ask whether registration, approval, inspection or pre-work documentation must happen before installation or construction.

03 / DOCUMENTS

What must I keep?

Find out which contracts, invoices, product details, permits, photographs and completion records are required.

01 — Ask the contractor

Start with these 10 questions

1. Does the work qualify?
2. Which products qualify?
3. Is an approved contractor required?
4. Must approval come before work?
5. Who submits the claim?
6. Who receives the payment?
7. What documents are needed?
8. Are inspections required?
9. What happens if costs change?
10. Are there maintenance or repayment conditions?
Contractor reviewing home improvement plans
02 — Know what the incentive actually covers

Separate eligible work from the rest of the renovation

A home renovation may contain many components, but an incentive may apply only to a defined improvement. Build your budget in two layers: the complete project and the portion that genuinely qualifies.

Budget areaQuestion to askWhat to verify
Energy upgrades Which efficiency improvements qualify? Product ratings, approved models, installation rules and claim timing.
Windows & doors Are specific products required? Performance ratings, manufacturer requirements and eligible installation.
Lighting Does the program cover efficient lighting? Eligible fixtures, quantities and proof of purchase.
Water-saving fixtures Which fixtures qualify? Efficiency specifications and approved product lists where applicable.
Safety or resilience work Are repairs or protective improvements included? Property eligibility, approved methods and inspection requirements.
General interiors Are cosmetic upgrades excluded? Do not assume kitchens, wardrobes, décor or furniture qualify simply because they are part of the renovation.
Modern home improvement materials and finishes
03 — Contractor and program requirements

Find out whether the installer must be approved

Some programs can require an approved contractor, qualified installer, specific product, inspection or documentation. Do not assume that any contractor can automatically complete eligible work for an incentive.

Ask the contractor to identify the program requirements in writing and verify them against the program operator’s current official terms. A contractor’s estimate should not replace the program’s own eligibility rules.

Important: Incentive rules can change, funding can be limited, and some benefits require action before work begins. Verify current terms with the program administrator.
04 — Understand the money flow

Ask how and when the benefit is actually received

UPFRONT

Discount at purchase

Confirm whether the contractor or retailer deducts the incentive immediately and whether the quoted price already reflects that deduction.

AFTER WORK

Rebate or reimbursement

You may have to pay first and claim later. Ask how long the process takes and which documents prove completion.

FINANCE

Loan or subsidized rate

A financing benefit is not the same as a grant. Compare interest, fees, term, security and total repayment.

05 — Protect the renovation budget

Calculate the real project cost

Do not subtract an advertised incentive from the quotation until you know that you qualify and understand all conditions. Calculate the full project price, subtract only a genuinely available benefit, then add financing costs, taxes, fees, required upgrades and contingency.

01 Full scope Price the complete renovation.
02 Eligible scope Identify only qualifying work.
03 Conditions Check approvals and documentation.
04 Net cost Calculate your actual remaining spend.
05 Contingency Keep funds for unexpected costs.
06 — Contractor quotation

Make the incentive visible in the contract

A clear contract should show the base project scope, eligible work, materials, labour, payment milestones, exclusions and any incentive assumptions. If the contractor is handling an application, define what they are responsible for and what remains your responsibility.

Base price
What the renovation costs before any incentive.
Eligible items
Which products or services are being claimed.
Incentive assumption
Whether the quoted benefit is confirmed, estimated or conditional.
Payment schedule
When you pay and when any reimbursement is expected.
Change orders
How changes affect eligibility and final cost.
Reviewing renovation contract and payment documents
07 — Common mistakes

Six assumptions that can create budget problems

01

Starting too early

Beginning eligible work before required approval can affect whether the work qualifies.

02

Assuming everything qualifies

A renovation can contain eligible and non-eligible components. Separate them clearly.

03

Using an unapproved installer

If the program requires an approved contractor, verify this before signing.

04

Ignoring paperwork

Missing invoices, product information or inspection records can complicate a claim.

05

Counting the rebate twice

Know whether a quoted price already includes a discount or incentive.

06

Ignoring financing costs

A low-cost loan or promotional rate still needs to be evaluated for fees and total repayment.

08 — Delhi NCR home interiors

Use the same discipline even when the incentive is not interior-specific

For a 2 BHK, 3 BHK, 4 BHK or larger home renovation in Delhi NCR, incentives may not apply to ordinary interior design work. The useful habit is still the same: define the complete scope, separate qualifying work from non-qualifying work, compare complete quotations and avoid building your project around an unverified discount.

Ask the contractor before you count the incentive.

Confirm eligibility, approved work, timing, documentation and the actual payment flow before using a rebate or incentive in your renovation budget.

Discuss Your Interior Project
FAQs

Home improvement incentive questions

What should I ask my contractor about home improvement incentive programs?

Ask whether the project qualifies, which work and products are eligible, whether approval is needed before work starts, whether an approved contractor is required, what documents are needed, who submits the claim and when the benefit is paid.

Do home improvement incentives pay for the entire renovation?

Usually an incentive applies only to qualifying work, products or costs and may have limits, eligibility conditions or funding caps. Verify the current program rules before budgeting around the benefit.

Should I apply for an incentive before hiring a contractor?

Some programs require approval or registration before work begins, while others may use different processes. Confirm the program’s timing requirements before signing or starting eligible work.

Does the contractor receive the rebate or incentive?

It depends on the program. The benefit may go to the homeowner, contractor, retailer or another approved party. Confirm who receives it and how it affects the contract price.

What documents should I keep for a home improvement incentive?

Keep the official program terms, application or approval, contractor agreement, invoices, receipts, product information, permits, inspection records and completion documentation required by the program.

Can a renovation loan be combined with an incentive?

It may be possible depending on the lender and program rules. Compare the incentive’s eligibility conditions with the financing agreement and confirm how the benefit is treated in the total project budget.

Ask The Contractor: Things To Know About Home Improvement Incentive Programs & Funding Read More »

Is It Worth It to Remodel a Small Kitchen to Make It Feel Larger? Investment Guide

Is It Worth It to Remodel a Small Kitchen to Make It Feel Larger?
Small Kitchen Remodeling Guide

Is It Worth It to Remodel a Small Kitchen to Make It Feel Larger?

A small kitchen does not always need more square footage. Sometimes the bigger opportunity is better planning: clearer circulation, smarter storage, brighter finishes and less visual clutter.

Plan Your Kitchen
Compact modern kitchen with efficient storage and bright finishes
The real question

Does the kitchen need more space—or better use of the space it already has?

A compact kitchen can feel more open when layout, storage, lighting, appliances and materials are planned together. Vertical storage, clear counters, reflective details and integrated appliances can improve both function and visual spaciousness.

WORTH CONSIDERING

Wasted layout

If doors, appliances or work zones create awkward movement, a remodel can improve usable space without enlarging the room.

HIGH IMPACT

Storage overload

If counters are crowded because cabinets are poorly organized, smarter storage can make the kitchen feel significantly larger.

MAY NOT NEED A REMODEL

Mainly cosmetic issue

If the layout works and the kitchen simply feels dark or cluttered, lighting, colour and organization may solve much of the problem.

01 — When remodeling makes sense

Five signs the existing kitchen is fighting you

1. Poor circulation
You repeatedly cross the same path while cooking or opening appliances blocks movement.
2. Dead corners
Cabinet corners and wall height are available but not being used effectively.
3. Countertop clutter
Small appliances and everyday items consume preparation space because storage is inadequate.
4. Oversized elements
Cabinets, appliances or furniture are out of proportion with the room.
5. Poor lighting
Dark surfaces and weak task lighting make the kitchen feel visually compressed.
Small kitchen with streamlined cabinets and open visual space
02 — What actually makes it feel larger

Remodel for visual space and usable space together

01

Improve the layout

Keep preparation, cooking, storage and cleaning zones logically connected. Avoid adding an island simply because the room can technically fit one.

02

Go vertical

Full-height cabinets can use unused wall area for pantry items and less-frequently used equipment while keeping the lower workspace clearer.

03

Clear the counters

Dedicated appliance cabinets, drawers and pull-outs can move everyday clutter away from the most visible surfaces.

04

Use integrated appliances

Built-in or appropriately scaled appliances can reduce visual interruptions and improve the continuity of the cabinetry.

05

Reflect light

Glass, selected glossy surfaces and a well-positioned backsplash can bounce light around the room when used without excessive visual noise.

06

Layer the lighting

Combine ambient light with under-cabinet task lighting so work surfaces do not disappear into shadow.

03 — The remodel decision matrix

Choose the level of work that matches the actual problem

Your problemPotential solutionRemodel level
Kitchen looks dark Lighting, lighter finishes, selected reflective surfaces, declutteringLight refresh
Not enough storage Vertical cabinets, deep drawers, pull-outs, pantry and corner organizersStorage-focused remodel
Appliances dominate Right-size or integrate appliances where practicalLayout + cabinetry
Poor movement Rework cabinet positions, appliance locations or circulationLayout remodel
Everything feels cramped Review layout, storage, proportions, finishes and lighting togetherComprehensive remodel
Bright compact kitchen with efficient cabinetry
04 — Storage without visual heaviness

More cabinets are not automatically better

Excess cabinetry can increase cost and make a compact kitchen feel visually heavy. Storage should follow what the household actually owns and uses.

Daily

Deep drawers for cookware, plates and utensils.

Weekly

Accessible pantry and appliance storage.

Occasional

High or less-accessible storage for rarely used items.

Specialized

Pull-outs and corner mechanisms only where they solve a real problem.

05 — Colours and finishes

Use visual continuity instead of too many boundaries

Light or warm-neutral finishes can help reflect light and create a more continuous visual field. A consistent palette across cabinets, walls, backsplash and flooring can make a compact room feel calmer and less fragmented.

That does not mean every surface has to be white. Soft beige, pale grey, light wood and restrained two-tone combinations can add depth without making the room feel busy.

Light neutral small kitchen with cohesive finishes
06 — Before you remove a wall

Do not assume structural changes are the answer

Opening a kitchen to an adjacent room can create a stronger sense of space, but it is not automatically the best solution. The decision depends on structure, ventilation, plumbing, electrical services, cooking habits, noise, storage and how the adjoining room is used.

Consider opening

When the kitchen feels isolated, the adjacent room has compatible use and the structural and service implications are manageable.

Consider keeping it closed

When strong cooking smells, noise, storage needs or household preferences make separation useful.

Consider partial openness

A glass partition, serving opening, half-height division or visually connected palette can create openness without fully removing separation.

07 — Five-stage remodel plan

Make the investment work harder

01 Measure Record walls, doors, windows, plumbing and appliance dimensions.
02 Inventory List cookware, groceries, appliances and storage needs.
03 Plan Test layouts and circulation before ordering cabinetry.
04 Specify Select materials, hardware, appliances and lighting.
05 Execute Coordinate installation, services and finishing carefully.
08 — When a full remodel may not be necessary

Try a targeted upgrade when the layout already works

A complete renovation is not the only way to improve perceived space. If the cabinet layout, plumbing and appliances are fundamentally functional, a smaller intervention may deliver a better proportion of benefit to cost.

LOWER SCOPE

Improve lighting

Add task lighting and correct dark zones before changing cabinetry.

LOWER SCOPE

Refresh surfaces

Repaint suitable cabinets or replace selected fronts and hardware where the underlying carcass is sound.

LOWER SCOPE

Reorganize storage

Add internal organizers and remove rarely used items before commissioning more cabinets.

09 — Delhi NCR small kitchens

Compact apartment kitchens need planning around real life

Small kitchens benefit from customized layouts based on room dimensions, cooking habits, storage requirements and style. Vertical storage, corner solutions, practical workflow and integrated appliances can help use every available centimetre more effectively.

A small kitchen can feel larger without becoming larger.

Start with layout, storage, lighting and visual continuity. Remodel the parts that solve a real problem, and avoid paying for complexity that does not improve the way you use the kitchen.

Discuss Your Kitchen
FAQs

Small kitchen remodeling questions

Is it worth remodeling a small kitchen to make it feel larger?

It can be worthwhile when the existing layout wastes space, storage is inadequate, circulation is uncomfortable or the finishes and lighting make the room feel darker and more crowded. If the layout already works and the problem is mainly visual, smaller upgrades may be enough.

How can a small kitchen be made to feel larger without removing walls?

Use a clear layout, vertical storage, light or cohesive finishes, reflective surfaces, integrated appliances, uncluttered counters and layered lighting. These changes can improve perceived spaciousness without increasing the room’s physical area.

Should I remodel the layout of a small kitchen?

A layout change can be useful when doors, appliances, storage or work zones create wasted movement. It should be evaluated against plumbing, electrical, ventilation, structural constraints and the cost of relocating services.

Do light colours really make a small kitchen look bigger?

Light and consistent colours can reflect more light and reduce visual boundaries, which may make a compact kitchen feel more open. Lighting, clutter, cabinet proportions and layout also affect the result.

What is the best storage for a very small kitchen?

Useful options include full-height cabinets, deep drawers, pull-outs, corner organizers, dedicated appliance storage and carefully planned overhead cabinets. Storage should be based on actual household inventory rather than maximizing cabinet count.

Can I make a small kitchen feel larger without a full remodel?

Yes. Decluttering, improving lighting, repainting, changing selected cabinet fronts or hardware, adding reflective surfaces and reorganizing storage can improve the visual feel when the existing layout is fundamentally functional.

Is It Worth It to Remodel a Small Kitchen to Make It Feel Larger? Investment Guide Read More »

How Can You Make a Small Kitchen Feel Larger? Design Secrets

How Can You Make a Small Kitchen Feel Larger? 12 Smart Design Ideas
Small Kitchen Design Guide

How Can You Make a Small Kitchen Feel Larger?

Use the space you already have more intelligently. The right layout, storage, lighting, colours and appliance choices can make a compact kitchen feel calmer, brighter and more open.

Plan Your Kitchen
Smart vertical storage
Clearer countertops
Better kitchen lighting
Space-efficient layouts
Bright compact kitchen designed with efficient storage
The principle

A small kitchen feels larger when fewer things compete for attention.

The goal is not simply to squeeze more cabinets into the room. Good small-kitchen design balances circulation, countertop space, storage, lighting, appliances and visual simplicity. Current Interior A to Z guidance similarly emphasizes using every square foot efficiently without making the room feel crowded.

01 — FUNCTION

Clear movement

Keep the primary path through the kitchen open and avoid placing deep furniture where doors and people need to move.

02 — STORAGE

Use the walls

Vertical cabinets and carefully planned overhead storage increase capacity without expanding the floor footprint.

03 — VISUAL SPACE

Reduce clutter

A quieter palette, fewer visible appliances and clearer countertops can make the same room feel more spacious.

01 — Start with the layout

Choose the kitchen shape that gives you the clearest working path

A single-wall, L-shaped, parallel or compact U-shaped kitchen can work well depending on the room. The correct choice depends on walls, doors, windows, plumbing, appliance positions and comfortable circulation.

Compact kitchen layout with efficient work zones
LayoutWhy it can workWatch for
Single-wallSimple circulation and useful for compact apartments or open plans.Limited worktop length; use vertical storage carefully.
L-shapedUses two walls while leaving the centre more open.Plan the corner so it does not become dead storage.
Parallel / galleyEfficient workflow in narrow rooms.Check aisle width, appliance doors and cabinet depth.
Compact U-shapedCan provide substantial storage and worktop area.Too much cabinetry can make the centre feel tight.
PeninsulaAdds preparation or breakfast space without a full island.Maintain clear circulation and seating clearance.
02 — Make the walls work harder

12 smart ways to make a small kitchen feel larger

01

Use full-height cabinets

Take suitable storage toward the ceiling to use vertical space for pantry goods and occasional-use items.

02

Keep counters clear

Give mixers, air fryers and other appliances a dedicated home rather than permanently occupying preparation space.

03

Choose deep drawers

Drawers can make cookware, plates and utensils easier to see and reach than stacked items in deep cabinets.

04

Use corner storage

Consider pull-outs, corner drawers or rotating mechanisms when they genuinely improve access.

05

Use light finishes

Light and medium-toned surfaces can reflect more light and create a visually calmer envelope.

06

Add reflective details

Glass, selected glossy surfaces, polished stone or stainless steel can bounce light through a compact room.

07

Keep colours connected

Repeating one or two major colours across cabinetry, walls and backsplash reduces visual boundaries.

08

Choose slim appliances

Right-sized appliances can preserve valuable counter and circulation space when they meet household needs.

09

Integrate appliances

Built-in or coordinated appliances can create cleaner cabinet lines and reduce visual interruptions.

10

Layer lighting

Combine ambient ceiling light with under-cabinet task lighting and selected accent lighting.

11

Use open shelves selectively

One carefully chosen open section can feel lighter; too many exposed objects can make the kitchen look busy.

12

Declutter ruthlessly

Store only what you actually use. Visual simplicity is one of the least expensive ways to make a room feel bigger.

Small kitchen with organized cabinetry and clear countertop
03 — Storage without clutter

Do not confuse more cabinets with better storage.

Storage should be planned around actual household inventory. Daily-use cookware belongs near the cooking and preparation areas; occasional items can move higher; groceries need sensible pantry capacity; appliances need a dedicated home.

Interior A to Z’s current storage guidance recommends measuring first, creating functional zones and using vertical space while keeping difficult corners and appliance dimensions in mind.

Daily

Drawers for cutlery and cookware.

Cooking

Spices, oils and pans near the hob.

Pantry

Tall storage for groceries.

Appliances

Concealed storage for small appliances.

04 — Lighting changes perception

Make every working surface visible.

Dark corners and shadows can make a compact kitchen feel smaller. Layered lighting creates a brighter, more readable space and improves everyday safety.

Ambient

General ceiling illumination for the whole room.

Task

Under-cabinet lighting for preparation surfaces.

Accent

Selected shelf or cabinet lighting for depth and atmosphere.

Natural

Keep windows and daylight paths as open as practical.

Kitchen with layered lighting and bright work surfaces
Light-toned kitchen surfaces creating a spacious visual effect
05 — Colour and surfaces

Use continuity to visually expand the room.

Light or warm-neutral colours can make a compact kitchen feel brighter. A consistent cabinet, wall and backsplash palette can also reduce visual interruptions.

For depth, add a controlled contrast through handles, a timber detail, a darker worktop or a small decorative element rather than introducing many competing colours.

06 — Worktops and backsplashes

Let the eye travel across the room.

Large-format surfaces and simple backsplash patterns can reduce visual interruption. Choose worktops based on durability, maintenance, heat performance, appearance and budget—not only on whether the material looks bright.

Fewer visual breaks

Simple patterns and coordinated surfaces can create a cleaner visual field.

Practical durability

A small kitchen still needs a worktop that can withstand everyday preparation and cleaning.

Easy maintenance

Consider joints, grout, stains and cleaning requirements before selecting decorative surfaces.

07 — Avoid these small-kitchen mistakes

What makes a compact kitchen feel even smaller?

01Too many cabinetsFilling every wall can create visual weight and reduce the feeling of openness.
02Oversized appliancesLarge appliances can consume counter, storage and circulation space unnecessarily.
03Open-shelf clutterToo many visible objects create visual noise even when the kitchen is clean.
04Ignoring doorsCabinet and appliance door swings can interfere with the main path through the kitchen.
08 — Flexible surfaces

Give the kitchen surfaces that can disappear when you do not need them.

A small kitchen benefits from multifunctional elements. A pull-out preparation surface, fold-down breakfast ledge or peninsula can provide useful working space without permanently occupying the room.

Before adding an island, test the actual clearance around it. In many compact kitchens, a smaller peninsula or retractable surface provides the better balance.

Compact kitchen with multifunctional work surfaces
09 — A practical planning sequence

Design the kitchen in this order.

01MeasureWalls, ceiling height, windows, doors, services and appliance openings.
02Map zonesPreparation, cooking, cleaning, storage and serving.
03Choose layoutSelect the arrangement that protects circulation.
04Plan storageAssign actual items to drawers, cabinets, pantry and tall units.
05Place appliancesConfirm actual dimensions, clearances and service requirements.
06Plan lightingCoordinate ceiling, task and cabinet lighting before fabrication.
07Select finishesUse a restrained palette and durable materials.
08DeclutterKeep visible surfaces intentionally simple after installation.
10 — Delhi NCR apartments

Small kitchens need customized planning, not standard cabinet rows.

In compact apartments across Gurgaon, Noida and Delhi NCR, the available space often has fixed plumbing, electrical points, windows, doors and appliance constraints. A customized modular kitchen can coordinate storage, workflow, finishes, lighting and services around those conditions.

Make the kitchen feel bigger by making every decision work harder.

Start with circulation and storage. Then use lighting, colour, materials and appliance planning to create a cleaner visual field.

Discuss Your Kitchen
FAQs

Small kitchen design questions

How can I make a small kitchen feel larger?

Improve the layout, keep countertops clear, use vertical storage, choose visually light and coordinated finishes, add reflective surfaces, use appropriate lighting and select appliances that fit the room’s scale.

What kitchen colours make a small kitchen look bigger?

Light and medium-toned neutrals, soft whites, warm beige, pale grey and light wood can help create a brighter and more continuous visual field. The overall result also depends on lighting, cabinet proportions and clutter.

Is a modular kitchen good for a small kitchen?

A well-planned modular kitchen can be useful because cabinets, drawers, appliances, storage accessories and work zones can be designed around the actual dimensions and daily routine of the kitchen.

How do I increase storage without making a small kitchen look crowded?

Use vertical cabinets, tall pantry units, deep drawers, selected pull-outs and concealed appliance storage. Avoid adding cabinets everywhere; plan storage around the items you actually use.

Does lighting make a small kitchen look bigger?

Yes. Layered ambient, task and selected accent lighting can reduce dark areas, improve visibility and make finishes and work surfaces read more clearly.

Should I use open shelves in a small kitchen?

Open shelving can create an airy section when used selectively, but too many open shelves can increase visual clutter. Use them for a small number of useful or decorative items.

Can a small kitchen have an island?

Only when sufficient circulation remains around it. In many compact kitchens, a peninsula, pull-out counter or compact breakfast ledge may provide useful surface area with less obstruction.

How Can You Make a Small Kitchen Feel Larger? Design Secrets Read More »

How Can You Entertain Guests From a Small Kitchen? Hosting Tips

How Can You Entertain Guests From a Small Kitchen? 10 Smart Ideas
Small Kitchen Entertaining Guide

How Can You Entertain Guests From a Small Kitchen?

A compact kitchen can still be the social heart of your home. The key is to design the room so cooking, serving, seating and conversation can happen without everyone competing for the same few square feet.

Plan Your Kitchen
Stylish compact kitchen connected to a social living space
The entertaining principle

Do not make the kitchen bigger. Make the social flow better.

Small-kitchen entertaining works when the cook can move efficiently, guests have somewhere natural to gather, and food and drinks can be served without blocking the main work zones. Interior A to Z’s small-kitchen guidance emphasizes clear movement, multifunctional surfaces, compact layouts and smart storage; its kitchen-layout guidance also recommends planning around the people who use the kitchen and whether they like to host.

01 — COOK

Protect the work zone

Keep the sink, cooktop, refrigerator and main preparation surface connected so cooking does not require crossing through guests.

02 — SERVE

Create one serving point

A peninsula, counter extension or clear worktop section can become the natural place for drinks, snacks and finished dishes.

03 — GATHER

Give guests a destination

Use stools, a nearby dining table or an adjoining living area so guests are close enough to talk without standing in the cooking path.

01 — Start with the layout

Let the cook stay connected to the room.

For entertaining, the best small kitchen is often one that maintains a visual and conversational connection with the adjacent dining or living area. L-shaped and peninsula layouts can be especially useful because they create a defined kitchen while leaving a more open social edge.

Compact L-shaped kitchen connected to dining space
LayoutEntertaining advantagePlanning priority
L-shapedOpen corner can connect naturally to dining or living.Use the corner efficiently and keep the main work path clear.
PeninsulaCreates a serving counter and optional guest seating.Protect circulation around the peninsula.
Single-wallLeaves more of the room open for social use.Use tall storage and carefully organize the work sequence.
GalleyEfficient cooking can be concentrated in a narrow footprint.Keep the passage clear and create a serving point at one end.
Open-planGuests can remain connected while the host cooks.Coordinate kitchen finishes, lighting and ventilation with the living area.
02 — Ten entertaining moves

10 small-kitchen ideas that make hosting easier

01

Create a serving counter

Reserve one section of countertop or a peninsula for finished dishes, drinks and snacks.

02

Seat guests at the edge

Use a two-seat breakfast ledge or peninsula so guests can talk without entering the work zone.

03

Use a mobile cart

A slim trolley can hold drinks, serving ware or extra preparation space and disappear when the gathering ends.

04

Hide small appliances

Keep mixers, toasters and other equipment in dedicated storage so the counter is ready for serving.

05

Prepare before guests arrive

Pre-chop ingredients, chill drinks and stage serving dishes so the kitchen needs less active movement during the gathering.

06

Keep drinks accessible

Place a drinks station near the social area so guests do not need to enter the cooking zone for every refill.

07

Use flexible surfaces

Fold-down counters, pull-out worktops and extendable surfaces provide capacity only when you need it.

08

Use layered lighting

Keep task lighting bright at the worktop and use warmer ambient light over seating or serving areas.

09

Keep sightlines open

Avoid tall storage or bulky furniture that unnecessarily separates the cook from guests.

10

Plan the cleanup path

Accessible bins, a clear sink zone and dishwasher storage make post-party cleanup less disruptive.

Small kitchen with clean serving counter and organized storage
03 — The serving zone

One clear counter can change the entire hosting experience.

A small kitchen becomes much easier to entertain from when one surface has a clear job: serving. It can hold a drinks tray, appetizers, plates, finished food or a coffee setup without interfering with the cooking zone.

Drinks

Glasses, water, mixers and chilled bottles.

Snacks

Small plates that guests can reach themselves.

Serving

Plates and finished dishes ready to leave the kitchen.

Coffee

A compact after-meal beverage station.

04 — Seating

Give guests somewhere to sit without adding a full dining table.

A peninsula or narrow counter can provide informal seating while preserving the footprint of the kitchen. Interior A to Z’s current island and seating guidance notes that compact kitchens can use narrow breakfast bars, two-seat islands, fold-down counters and wall-mounted extensions.

Two-stool peninsula

Useful where the kitchen opens toward the living area.

Fold-down ledge

Disappears when cooking or cleaning requires the space.

Mobile island

Can move between prep, serving and storage roles.

Nearby dining

Keep the main meal table just outside the kitchen work zone.

Compact kitchen with informal seating area
05 — Protect the cooking zone

Guests should feel included—not get in the way.

01CookingKeep the hob and oven in a defined work zone.
02PrepReserve uninterrupted counter space for chopping and plating.
03ServeMove finished food to a separate serving surface.
04SocialPosition stools or seating just outside the main work path.
05CleanKeep waste, sink and dishwasher access practical.
06 — Conceal the clutter

Entertaining feels more relaxed when the kitchen can reset quickly.

Small kitchens show clutter quickly. Full-height cabinets, deep drawers, appliance storage and organized pantry space help remove visual noise before guests arrive. Current Interior A to Z small-apartment guidance specifically recommends concealed organizers, appliance storage and minimal countertop styling.

Keep only a few useful items visible: perhaps a coffee station, one tray, a plant or herbs. Everything else should have a defined storage home.

Organized kitchen storage with uncluttered counters
Kitchen lighting creating a warm atmosphere for entertaining
07 — Lighting for two moods

Bright for cooking. Warm for conversation.

Entertaining requires more than task lighting. Keep preparation surfaces well illuminated, then use warmer ambient lighting around the social edge of the kitchen.

Task

Under-cabinet light over preparation surfaces.

Ambient

General illumination for safe movement.

Pendant

Focused light above a peninsula or breakfast counter.

Accent

Subtle cabinet or shelf lighting for evening atmosphere.

08 — Make the kitchen part of the room

Visual continuity makes entertaining feel more natural.

In an open-plan home, the kitchen should relate to the dining and living areas through materials, colour and lighting. Current Interior A to Z guidance on open kitchens emphasizes material continuity, integrated appliances, zonal architecture and concealed engineering to preserve a clean social environment.

Repeat materials

Carry a wood tone, stone tone or neutral colour from the kitchen into nearby furniture or cabinetry.

Define without closing

Use a peninsula, island, rug, lighting change or furniture arrangement to create zones without a wall.

Control cooking impact

Plan effective ventilation and keep noisy or visually bulky equipment as discreet as practical.

09 — A hosting setup that works

Use a simple five-zone arrangement.

01Prep zoneIngredients, knives, boards and waste close together.
02Cook zoneHob, oven and cooking tools kept concentrated.
03Serve zoneA clean counter for finished dishes and snacks.
04Drink zoneAccessible water, glasses and beverages away from cooking.
05Social zoneStools, dining or living seating within conversation distance.
10 — Common mistakes

What can make a small kitchen difficult to entertain from?

Oversized island

An island that removes the circulation you need is not an entertaining solution.

Guests in the work zone

Without a defined social edge, visitors naturally stand where cooking and cleaning happen.

No serving surface

Finished food competes with chopping boards, appliances and dirty dishes when there is no dedicated staging point.

Too much open storage

Visible dishes and equipment can quickly make a compact kitchen look crowded.

Single lighting circuit

One bright ceiling light can be functional but does little to create a relaxed evening atmosphere.

Poor ventilation

Cooking odours and heat matter more when the kitchen connects directly to living and dining spaces.

11 — Delhi NCR compact homes

Small kitchens in Gurgaon, Noida and Delhi NCR can still be social spaces.

Compact urban kitchens benefit from customized layouts that combine storage, preparation, serving and social interaction. L-shaped kitchens, peninsulas, flexible counters, integrated appliances and carefully planned lighting can help a small kitchen support everyday cooking as well as guests.

The best entertaining kitchen is not the biggest one. It is the one that keeps everyone connected.

Give cooking, serving and conversation their own places—and let the kitchen work hard without feeling crowded.

Discuss Your Kitchen
FAQs

Entertaining from a small kitchen

How can you entertain guests from a small kitchen?

Create a compact social zone with a clear serving surface, efficient prep area, easy access to drinks and dishes, flexible seating and layered lighting. Keep the main circulation path clear so guests can interact without blocking cooking work.

Can a small kitchen have seating for guests?

Yes. A peninsula, breakfast counter, fold-down ledge or narrow island can provide seating when there is enough clearance for comfortable movement. Seating should not obstruct appliance doors or the primary circulation route.

What is the best small kitchen layout for entertaining?

L-shaped, peninsula and suitable open-plan layouts can work well because they allow the cook to face or remain connected to adjacent living areas. A galley kitchen can also work when circulation and serving points are carefully planned.

How do I keep a small kitchen tidy while entertaining?

Use concealed appliance storage, clear one dedicated serving area, keep waste and recycling accessible, prepare ingredients before guests arrive and use drawers or pantry storage to quickly remove visual clutter.

How can lighting improve entertaining in a small kitchen?

Use task lighting for preparation and warmer ambient or pendant lighting around seating and serving areas. Separate lighting zones let the kitchen remain functional while creating a more relaxed evening atmosphere.

Should I add a kitchen island to entertain in a small kitchen?

Only if the island leaves adequate circulation. In many compact kitchens, a peninsula, mobile cart or fold-down counter can provide preparation and serving space with a smaller footprint.

How can I make a small kitchen feel more social?

Connect it visually to the dining or living area, orient seating toward the cook, use a serving counter or peninsula, keep sightlines open and avoid tall elements that unnecessarily separate the kitchen from guests.

How Can You Entertain Guests From a Small Kitchen? Hosting Tips Read More »

Do You Need to Eliminate Items From a Small Kitchen? Space-Saving Tips

Do You Need to Eliminate Items From a Small Kitchen? 12 Smart Decluttering Rules
Small Kitchen Decluttering Guide

Do You Need to Eliminate Items From a Small Kitchen?

You may not need to throw away your essentials. The smarter first step is to decide what deserves prime kitchen space, what can move elsewhere, and what no longer earns its place.

Plan Your Kitchen
Organized compact kitchen with clean counters and practical storage
The short answer

No. Start by eliminating clutter—not useful capability.

The original Interior A to Z article makes the same core point: a small kitchen does not automatically require sacrificing essentials. Better use of vertical space, compact appliances and modular storage can make the existing collection of useful items work harder.

KEEP

Useful essentials

Items you use regularly, genuinely need and can store safely should remain part of the kitchen system.

RELOCATE

Occasional items

Seasonal cookware and special serving pieces may belong in higher cabinets, a utility area or another suitable storage location.

REMOVE

Space wasters

Broken, expired, duplicated or genuinely unused items are the easiest candidates for removal.

01 — Before you throw anything away

Ask one question: does this item earn its space?

In a small kitchen, every shelf, drawer and countertop has an opportunity cost. The objective is not minimalism for its own sake; it is keeping the items that support how your household actually cooks.

Frequency
Do you use it weekly, monthly or almost never?
Function
Does it perform a job that another item already does?
Condition
Is it safe, complete and working?
Footprint
Does its storage requirement justify its usefulness?
Organized kitchen cabinets and drawers in a compact kitchen
02 — The five-category sort

Do not make every item a keep-or-trash decision.

01

Keep here

Daily cookware, utensils, ingredients and appliances should stay close to their point of use.

02

Move elsewhere

Items you need but rarely use can move to loft, utility or other suitable storage.

03

Seasonal storage

Festival crockery, occasional baking equipment and seasonal items do not need prime cabinet space.

04

Donate

Useful duplicates or items that no longer fit your household routine can serve someone else.

05

Discard

Broken, expired, unsafe or incomplete items should not consume valuable storage.

06

Decide later

If you genuinely cannot decide, box the item and review it after a defined period rather than letting it return to the counter.

03 — Start with the easy wins

12 things worth checking first in a crowded small kitchen

01

Broken utensils

Cracked, damaged or unsafe tools rarely deserve permanent storage.

02

Expired food

Check pantry shelves, sauces, spices and forgotten packets before buying more storage.

03

Duplicate cookware

Keep the sizes and types you actually use instead of multiple near-identical pieces.

04

Container mismatches

Containers without usable lids are a common source of wasted cabinet space.

05

Unused gadgets

If an appliance has not been used for a long time, question whether it deserves daily kitchen storage.

06

Excess mugs

Keep enough for normal household use and entertaining rather than storing every promotional mug.

07

Chipped crockery

Damaged plates, cups and bowls can be replaced or removed rather than occupying premium shelves.

08

Old packaging

Bulky packaging around groceries often consumes more space than the food itself.

09

Rarely used tools

Move specialist tools to secondary storage if they are genuinely useful but rarely needed.

10

Extra serving ware

Review duplicate serving bowls, trays and glasses, especially if they are stored in prime cabinets.

11

Countertop clutter

Some items do not need to be eliminated; they simply need a proper storage location.

12

Decorative overload

A few intentional objects can work better than many small pieces competing for limited visual space.

Compact kitchen with efficient cabinet storage
04 — Storage before sacrifice

Sometimes the problem is the cabinet, not the contents.

Before eliminating useful items, inspect whether the kitchen is using its available storage intelligently. Measure first, create activity-based zones and use vertical space, drawers, pantry units and corner storage appropriately.

Vertical
Tall cabinets and overhead storage.
Drawers
Deep storage for cookware and utensils.
Corners
Carousels, pull-outs or accessible corner drawers.
Appliances
Dedicated concealed or integrated storage.
05 — Organize by activity

Put things where you use them, not where there happens to be an empty shelf.

ZoneKeep nearbyPossible storage
Preparation Knives, boards, bowls, measuring tools Drawer organizers, nearby base drawers
Cooking Pots, pans, oils, spices, utensils Deep drawers, spice pull-outs, lower cabinets
Cleaning Dishwashing products, waste, cleaning tools Under-sink storage, integrated bins
Pantry Grains, pulses, flour, packaged food Tall pantry, pull-out pantry, loft
Serving Plates, glasses, bowls, serving pieces Drawers, accessible wall cabinets
06 — Appliances

Keep the appliances that earn their footprint.

Appliances can consume an extraordinary amount of counter and cabinet space. Instead of automatically getting rid of them, classify them by frequency and function.

Daily

Keep accessible or integrated into the working zone.

Weekly

Give them nearby storage so setup remains easy.

Seasonal

Move to higher or secondary storage when appropriate.

Never used

Consider selling, donating or recycling responsibly.

Compact kitchen with integrated appliance planning
07 — Indian kitchen reality

Decluttering should respect how you actually cook.

Indian kitchens can require pressure cookers, tawas, kadais, spice containers, grains, pulses, serving vessels and small appliances. The answer is not to apply a generic minimalist checklist. Plan storage around the household’s cooking frequency, family size and actual inventory.

Heavy cookware

Keep pressure cookers and large vessels in strong, accessible lower storage.

Spices & masalas

Use dedicated drawers or pull-outs close to the cooking zone.

Bulk groceries

Use pantry or tall storage rather than scattering staples across small cabinets.

08 — The 20-minute reset

A simple routine for keeping a small kitchen under control.

01 Clear Remove everything that does not belong on the countertop.
02 Group Put similar items together by cooking activity.
03 Check Identify duplicates, expired products and broken items.
04 Relocate Move occasional items away from prime daily storage.
09 — Do not over-declutter

A small kitchen still needs enough capacity.

A kitchen that looks beautifully empty but lacks the tools your household needs is not well designed. The goal is controlled storage, not an artificially low item count.

Keep duplicates when justified

A larger household or frequent entertaining may legitimately require more plates, glasses or cookware.

Keep specialist tools you actually use

A low-frequency item can still deserve a place if it has a real role in your cooking routine.

Move rather than discard

Secondary storage can preserve useful capability without sacrificing prime kitchen space.

10 — Gurgaon, Noida & Delhi NCR

Compact apartment kitchens need storage designed around real inventory.

For smaller urban kitchens, combine vertical storage, pull-outs, corner solutions, drawers, appliance storage and activity-based zones while protecting circulation and countertop space.

Do not eliminate useful things just because the kitchen is small.

First remove what is broken, duplicated, expired or genuinely unused. Then redesign the storage around the things your household actually needs.

Plan Smarter Storage
FAQs

Small kitchen decluttering questions

Do you need to eliminate items from a small kitchen?

Not necessarily. First improve storage, organization and placement. Eliminate or donate items when they are broken, duplicated, expired, rarely useful or taking up valuable space without enough benefit.

What should I remove from a small kitchen first?

Start with broken items, expired food, duplicate utensils, containers without matching lids, appliances you never use and damaged or unwanted crockery. These usually consume space without providing useful function.

How do I declutter a small kitchen without throwing away useful items?

Sort items into keep, relocate, seasonal storage, donate and discard groups. Then redesign storage around actual usage, using vertical cabinets, drawers, pull-outs and dedicated zones before deciding that useful items must go.

How many kitchen appliances should I keep?

Keep appliances that are used regularly or perform a genuinely useful function for your household. Multi-purpose appliances can reduce duplication, while seasonal appliances can be stored elsewhere if kitchen space is limited.

How can I reduce countertop clutter in a small kitchen?

Store occasional-use appliances in dedicated cabinets, use wall or under-cabinet storage where appropriate, group essential items on a tray and keep only frequently used equipment on the worktop.

Should I get rid of duplicate kitchen utensils?

Usually, duplicates are a useful place to start, especially when they serve the same purpose and are rarely needed simultaneously. Keep enough for your household size and normal cooking routine.

Can better storage prevent me from eliminating kitchen items?

Yes. Better storage can reclaim vertical space, corners, deep drawers and concealed areas. However, storage should not become a reason to keep broken, expired, duplicated or genuinely unused items.

Do You Need to Eliminate Items From a Small Kitchen? Space-Saving Tips Read More »

Scroll to Top